Published On Aug 16, 2023
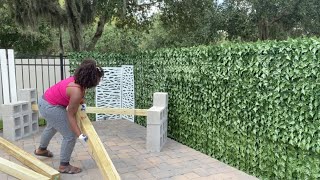
Hi there friends, in today’s video I’m going to show you how I give our back porch privacy fence a refresh. I’ve teamed up with my friends over at Smart Planet Plants to incorporate a bunch of fun and colorful succulents into my design. I started by pressure washing the existing wood slats and sealing the wood with a marine varnish before moving on to building the reinforce slats on the back side. The wood slat privacy fence needed a little more support in order for me to be able to hang planter boxes from it, so I reinforce the back section of the slats with 2x3’s and 2x4’s. I alternated between the two sizes to give a textural element to the porch side of the privacy fence. Then I made a bunch of different size planter boxes from cedar fence pickets. I cut a bottom grove on all the boards on my table saw for the bottom board of the box to sit in. I used my miter saw to cut all the boxes to size, then I used wood glue and brad nails to assemble them. I did a rough sanding to all the boxes with 120. Then I gave them all a health coat of LUST marine varnish from Total Boat. Once all the boxes were dry I did a rough layout of how I wanted to mount them. Once I had a general layout I got started on mounting the boxes to the privacy fence using stainless steel screws. I quickly found that it was easier to start mounting the boxes from the bottom section of the privacy fence rather than the top section. After I had all the boxes mounted, I gave one more coat of total boats lust to the outside, just to make sure everything was watertight. Then I got to planting I did a general layout of which plants I wanted in which boxes then I started to plant from top to bottom. I used a little bit of Sphagnum Moss to hold in some of the plants that were mounted face out this helped keep the soil from falling out, and kept the plant secured to the planter box. I absolutely love the finished result of the privacy fence refresh. I love all the colorful succulents and how the boxes are displayed in different orientations. I love seeing it from all the different angles the porch side the side view and the outside view. Big thank you again to @SmartPlanetPlants for teaming up with me on this fun project. Thanks for watching friends and until next time when we create something fun and unique together.
If you enjoyed this video be sure to like and subscribe to my channel.
Thanks in advance Friends
Be sure to follow me on Instagram & TikTok @Wood_Brain
Business Inquires contact: [email protected]
Support me on Patreon:
https://www.patreon.com/Wood_Brain?fa...
BIG Thank you to:
@AltmanPlants & SmartPlanetPlants for providing me with all the beautiful plants for this fun project.
Thank you to my awesome husband
@nobadtides on Instagram for all ways being an amazing supporter.
More info…
Camera Used:
Canon GX7 markii
https://amzn.to/3uXytVK
Tripod:
https://amzn.to/36z807A
Wheels for tripod
https://amzn.to/3uZt8Nx
I edited this video myself (super proud) with Adobe Premiere Pro. I’ve learned everything thus far about editing via YouTube tutorials, and a little trial and error along the way. This was the first video I figured out how to add captions, which I’ll be doing moving forward.
Music:
All music used was from Epidemic Sound