Published On Jun 21, 2023
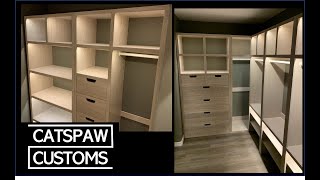
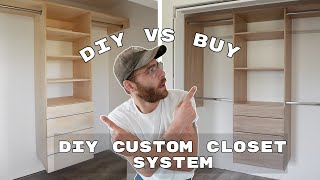
Hi there friends, in today’s video I’m showing you how I built a custom closet using 3/4” plywood and a lot of edge banding… I’m so beyond proud of how this custom closet turned out. Because everyone closet is different in size, I didn’t talk sizes and dimensions throughout the build. My closet is 5’x5’-1/2”… I started with a little demo and removed all of the old shelving in the closet, then I patched the walls and gave the closet a fresh coat of paint. I moved on to replacing the door with a sliding barn door which helped gain more space on the inside wall I also replaced the light with a brighter and more functional flush ceiling mount light that I found on Amazon. I laid out the closet design using painters’ tape, then I put the design in sketch up and realized that I had a few areas that I needed to adjust, once I knew the layout of the closet, I took the tape off and marked out the studs using a stud finder so I knew where to mount everything. I picked up multiple sheets of 3/4” birch plywood and ripped them down to size using my Skateplate by Circsaw. I used edge banding for all of the plywood edges that would be exposed to make everything look seamless. I end up using around 250 feet of edge banning total. After I assembled the drawers and the drawer slides, I realized when I went to install the drawer fronts that I had used the wrong spacing, it was an easy fix and after I got the correct spacing the drawer fronts looked amazing with a 1/8” gap in-between each drawer. I purchase all of the hardware off of Amazon, the drawer slides and the drawer pools I purchased them in a multi pack to save on cost. Before I assembled everything, I laid all of my pieces out flat and gave them multiple coats of Total Boat Halcyon using the HVLP turbo sprayer by Apollo. After I let them dry for a full 24 hours, I assembled all of my pieces and mounted them into the closet. I added the finishing touches with a cool wallpaper mural by wallism.com and a full-length mirror that I found off Amazon. I'm beyond proud of how this custom closet turned out, this is my first time building out a custom closet, I learned a lot along the way and I’m super proud of the outcome.
If you enjoyed this video be sure to like and subscribe to my channel.
Thanks in advance Friends
Be sure to follow me on Instagram & TikTok @Wood_Brain
Business Inquires contact: [email protected]
Support me on Patreon:
https://www.patreon.com/Wood_Brain?fa...
This video is not sponsored however I have a bunch of thank you’s to give to some amazing companies that sent me some awesome tools to use in this custom closet build.
Big Thanks to: Use Code: WOOD BRAIN
-Stud Buddy
-Spyder -Ultra Fine tooth blad
-Skateplate by Circsaw
-Bora Speedhorse XT
-Apollo HVLP Turbo Sprayer
-Total Boat Halcyon
Some of the products I purchased off Amazon:
-Shelf Pin jig by Kreg
-Pocket hole jig by Kreg
-Full length mirror
-Wood clothes hangers
-Ceiling mount light
-Drawer pulls
-Drawer slides
-Edge banding
-Wallpaper mural from Wallism.com
Thank you to my awesome husband
@nobadtides on Instagram for all ways being an amazing supporter.
More info…
Camera Used:
Canon GX7 markii
https://amzn.to/3uXytVK
Tripod:
https://amzn.to/36z807A
Wheels for tripod
https://amzn.to/3uZt8Nx
I edited this video myself (super proud) with Adobe Premiere Pro. I’ve learned everything thus far about editing via YouTube tutorials, and a little trial and error along the way.
Music:
All music used was from Epidemic Sound