Published On Mar 19, 2024
1) Everyone knows that I collect broken umbrellas. I'll show you what useful and beautiful thing I turn them into.
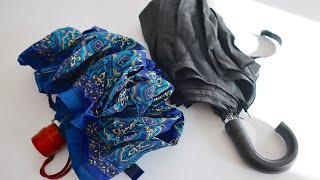
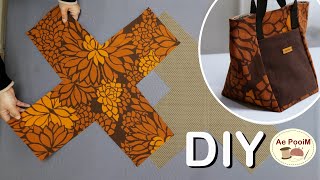
Today I want to tell you how to sew a bag from an umbrella for going to the store.
The highlight is that it can be folded into a small square and fastened with a clasp. Such a folded envelope will not take up much space in a lady's bag and will save money on buying packages.
You can put heavy products in this bag without fear of the handles coming off.
Almost all the fabric of the umbrella is spent on sewing, only small pieces remain.
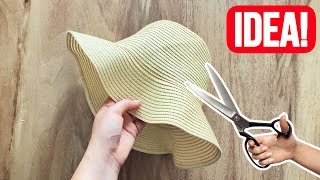
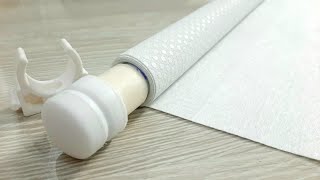
- First you need to tear the fabric from the knitting needles. This is convenient to do with a stationery knife.
- Carefully rip off the Velcro strip that secures the umbrella from opening; it will be the clasp.
- Wash and iron the bologna. The iron should be set to two so as not to scorch the fabric.
- Fold the fabric in half, aligning all the seams together.
- Draw a rectangle. Set aside 20 cm from the center. This will be the width of the bag - 40 cm.
- Lower the lines to the end, this will be the length of the bag. Cut out.
- The fabric that remains on the side will be used to trim the handles and the top of the bag.
- Place it face down on the bag and line it up. Do the same on the other side.
- Cut out the handles. To do this, make a pattern on paper, the distance between the handles is 22 cm, and the height is 10 cm. Cut it out.
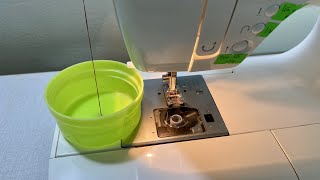
- The handles are 20 cm long on the side. Sew along the contour, starting from the handle, the oval part and the second handle. Make notches where there is a semicircle.
- Turn inside out and sew a finishing stitch.
- Sew the bottom of the bag, starting from the handles on three sides. Finish the edges with an overlocker.
- Make folds on the sides towards the center of the bag and stitch the folds at the top of the handles and at the bottom.
- We turn it inside out and it turns out to be a bag like this.
- A strap is sewn to the center.
- It folds like this: first lengthwise into 3 parts, and then across several times, you need to practice. Secure with Velcro.
2) At least break the umbrellas on purpose. From a broken umbrella to stylish garden decor (I never thought of this before).
A broken umbrella should not be thrown away immediately. In skillful hands, you can use it to make many interesting things for your home or garden.
From the torn fabric you can sew a bag, an apron, and armlets for dirty work. You can come up with clothes for your pet, cat or dog.
And from the umbrella frame I will make a wonderful decoration for the garden!
Description of work:
- Freed the twigs from the leaves. It's easy to do. You just have to stretch out your hand “against the fur.”
It is very important that the vine is damp, then it bends well in any direction. Now is the time to use it.
If the branches are dry, they should be soaked in water for several days. The wood will be saturated with moisture, and they will become flexible.
- You need to start weaving from the top and continue in a circle.
- In order for the branches not to unravel, you need to adapt. The edges were intertwined.
- Where the knitting needles widen, I took 2-3 thin branches and intertwined them with each other and with the knitting needles.
- When everything was ready, I tied the edges to each knitting needle with a thin twig.
The result is a stylish accessory for the garden.
How do you like this umbrella?
3) Why did I pick up a broken umbrella on the street. I'll show you what a useful thing came out of it.
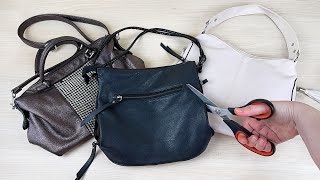
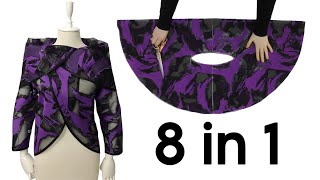
The most common things made from umbrellas are handbags and aprons. You can also sew a cape with a hood from rain and wet snow. The dome size is just right for an adult without waste.
Before work, you first need to tear the fabric from the frame and wash it.
When I started doing it, I didn’t know exactly what would happen, but along the way everything worked out.
As soon as I cut the first seam it became clear what was what.
How to sew:
- I cut three sections, they make a nice deep hood. This part was folded in half. Where the hood will be sewn to the cape, I drew a line equal to 24 centimeters. Next, I also cut off a little bologna from the back and front of the hood.
- I made a dart on the top of my head, tried it on myself, everything was perfect. The fabric does not fray, so it does not need additional processing; just trim the seams with scissors.
- I also folded the rest of the dome in half, attached the finished hood and cut off the excess. The neckline was rounded and straightened.
- I sewed ties from the leftover fabric.
- I connected the neck line and the hood, put the ties between them at the front of the product, and stitched it. If the connection lines do not match in length, you can make small folds when stitching.
- Open sections were folded and stitched.
- This cape is easy to fold and fasten to the umbrella strap. It won't take up any space in your bag.
In bad weather, this will be an excellent escape from the rain; it is also convenient because your han