Published On Mar 1, 2019
Butcher Block Countertop | Finishing and Installing
Learn how to transform an unfinished butcher block countertop into a custom fitted, professional looking countertop for your kitchen, bath, garage, or any work surface area.
Sink install video: • Convert a Metal Cabinet to a Sink Bas...
The hardest part about installing a butcher block countertop is getting it home from the store! After that, you just need to:
Size your countertop by cutting it to length and possibly to width - some countertops are more than 25” wide which creates more overhang than you need for 24” deep cabinets.
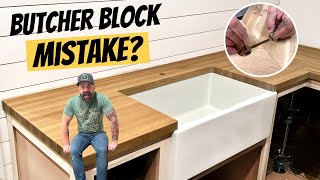
Cut nice corners on your butcher block countertop to get rid of those sharp corners (aka hip bruisers). You can use a router, a flush cutting bit, and a radius cutting jig to easily create rounded corners.
Soften the edges of the countertop by using a round over bit in your router OR create a more decorative edge bit such as an Ogee.
Sand your countertop using a random orbital sander using 120 grit, then 180 grit, then 220 grit sandpaper.
This butcher block countertop is going in the garage so it gets a simple varnish oil blend using mineral spirits, polyurethane, and boiled linseed oil.
Install your butcher block countertop from the underside using screws.
Visit Us!
http://toolboxdiy.com/
Tools You’ll Need:
Circular saw
Straightedge
Jigsaw
Block plane (optional)
Router with flush cut bit and round over bit
Radius cutting jig
Random orbital sander
Drill and driver
Subscribe For More How-To Videos and DIY Tips!
https://www.youtube.com/c/toolboxdiy?...
Connect with Toolbox DIY!
Twitter ► / toolboxdiy
Facebook ► / toolboxdiy
Instagram ► / toolboxdiy