Published On Oct 31, 2023
Applying individual eyelash extensions requires precision and patience. It's typically done by a trained and certified lash artist, but if you're interested in learning about the process, here's a simplified guide on how to isolate, fan, and place
Lash extensions, along with some tips:
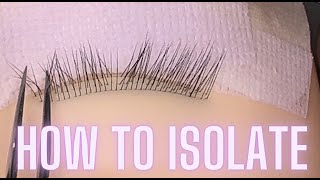
ISOLATING LASHES
1.Prepare Your Workspace:Ensure your workspace is clean, well-lit, and organized with all the necessary tools and supplies.
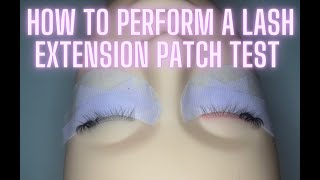
2.Clean the Natural Lashes:The client's natural lashes should be clean, free of makeup, oils, and debris. Use a lash cleanser or saline solution to clean them if necessary.
3.Tape Down Lower Lashes:Use disposable adhesive tape to gently tape down the lower lashes, keeping them out of the way during the application.
4.Isolate a Natural Lash:Using fine-pointed tweezers, isolate a single natural lash by gently gripping it near the base, ensuring that it's separated from the surrounding lashes. The isolated lash should be free from any other lashes or obstructions.
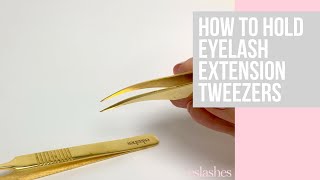
5.Prepare an Extension:With another pair of tweezers, pick up an eyelash extension with the adhesive already applied to the base. Hold the extension horizontally between the tweezers.
FANNING LASH EXTENSIONS
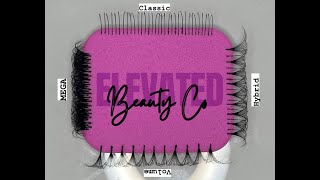
Create a Fan (for Volume Lashes):
1.If you're doing volume lashes (applying multiple extensions to one natural lash), gently pinch the base of the extensions together using the tweezers to create a fan. The number of extensions in the fan depends on the desired volume (e.g., 2D, 3D, 4D, etc.).
PLACING LASH EXTENTIONS
1.Position the Extension:With the fan or single extension ready, carefully position it a few millimeters away from the base of the isolated natural lash. Be precise to avoid contact with the skin.
2.Secure the Extension:Gently release the extension or fan onto the isolated natural lash, ensuring it adheres to the natural lash without twisting or tilting. It should sit securely but not too tight to avoid discomfort.
3.Repeat the Process:Continue isolating, fanning (if applicable), and placing extensions on each natural lash one at a time. Work systematically, typically from the inner corner of the eye to the outer corner.
4.Check for Clumping:Periodically check for any clumping or sticking together of lashes. Use a clean spoolie or lash comb to separate and define the extensions as you go.
5.Drying Time:Allow the adhesive to dry completely. It's essential to avoid moisture, steam, or excessive touching during this time.
Tips:
-Practice is key to mastering the art of applying lash extensions. Consider enrolling in a reputable lash extension training program if you're serious about becoming a lash artist.
-Use high-quality adhesive and extensions to ensure a comfortable and long-lasting result.
-Always prioritize the comfort and safety of your client by following proper hygiene and safety protocols.
-Pay attention to the client's eye shape, desired look, and any allergies or sensitivities when selecting extensions and designing the lash set.
-Properly isolating and fanning lashes requires steady hands and focus. ----Take your time to ensure a precise application.
-Be patient and always communicate with your client to understand their preferences and any discomfort they may experience during the process.
Remember that becoming a skilled lash artist takes time and practice, and it's essential to invest in proper training and certification for the best results.
THANK YOU FOR WATCHING
Don't forget to
LIKE | COMMENT | SHARE | SUBSCRIBE
Instagram @ Elevated_beautyco
TikTok @ Elevatedbeautyco