Published On Apr 29, 2020
join us for my what's app group
https://chat.whatsapp.com/KqFqgEkyR9A...
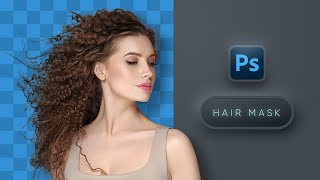
Learn how to use the dedicated Select And Mask workspace in Photoshop.
Creating accurate selections and masks in Photoshop is now quicker and easier than ever before. A dedicated new workspace helps you make precise selections and masks. Use tools like the Refine Edge Brush to cleanly separate foreground and background elements and do much more.
Quick Selection Tool
Make quick selections based on color and texture similarity when you click or click-drag the area you want to select. The mark you make doesn’t need to be precise, because the Quick Selection tool automatically and intuitively creates a border.
Refine Edge Brush Tool
Precisely adjust the border area in which edge refinement occurs. For example, brush over soft areas such as hair or fur to add fine details to the selection. To change the brush size, press the bracket keys.
Object Selection Tool
Draw a rectangular region or a lasso around an object. The Object Selection tool finds and automatically selects the object inside the defined region.
View Mode. From the View pop-up menu, choose one of the following view modes for your selection:
Onion Skin (O): Visualizes the selection as an animation-style onion skin scheme
Marching Ants (M): Visualizes the selection borders as marching ants
Overlay (V): Visualizes the selection as a transparent color overlay. Unselected areas are displayed in that color. The default color is red.
On Black (A): Places the selection over a black background
On White (T): Places the selection over a white background
Black & White (K): Visualizes the selection as a black and white mask
On Layers (Y): Surrounds the selection with areas of transparency
Press F to cycle through the modes and X to temporarily disable all modes.
Show Edge: Shows the area of refinement.
Show Original: Shows the original selection.
High Quality Preview: Renders an accurate preview of the changes. This option may affect performance. When this option is selected, while working on the image, hold down the left mouse button (mouse down) to view a higher-resolution preview. When this option is deselected, a lower-resolution preview is displayed even on mouse down.
Transparency/Opacity: Sets transparency/opacity for the View Mode. This setting applies beyond the Select And Mask workspace to the Overlay view mode in classic Photoshop.
Edge Detection settings
Radius. Determines the size of the selection border in which edge refinement occurs. Use a small radius for sharp edges, and a large one for softer edges.
Smart Radius. Allows for a variable width refinement area around the edge of your selection. Among other use cases, this option is helpful if your selection is a portrait that includes both hair and shoulders. In such portraits, the hair might require a larger refinement area than the shoulders, where the edge is more consistent.
Global Refinement settings
Smooth. Reduces irregular areas (“hills and valleys”) in the selection border to create a smoother outline
Feather. Blurs the transition between the selection and the surrounding pixels
Contrast. When increased, soft-edged transitions along the selection border become more abrupt. Typically, the Smart Radius option and refinement tools are more effective.
Shift Edge. Moves soft-edged borders inward with negative values or outward with positive ones. Shifting these borders inward can help remove unwanted background colors from selection edges.
Output Settings
Decontaminate Colors. Replaces color fringes with the color of fully selected pixels nearby. The strength of color replacement is proportionate to the softness of selection edges. Adjust the slider to change the decontamination amount. 100% (maximum strength) is the default value.
Important: Because this option changes pixel color, it requires output to a new layer or document. Retain the original layer so you can revert to it if needed.
Output To. Determines whether the refined selection becomes a selection or mask on the current layer, or produces a new layer or document
TAGS : Vanavil Nagarajan,select and mask,How to Use Select and mask in photoshop cc,how to select and mask hair in photoshop cc,select and mask photoshop cc 2019,select and mask option in photoshop cc,refine edge in photoshop,refine edge in photoshop 2019,Photoshop Hair Selection,object selection tool 2020,object selection tool,cc 2019 photoshop tutorial,photoshop tutorial,cut out hair,select and mask photoshop cc 2020,select and mask photoshop cc 2018
Thank you.