Published On Apr 26, 2020
Please don’t repair a piece of furniture without knowing how to fix it properly. This bad furniture repair took more time to fix that it would have the first time. See how to undo this bad furniture repair and learn how to fix it the right way. If you don’t, you could permanently ruin the furniture so it can’t be repaired and the parts would have to be replaced.
Welcome to the workshop of Wooden It Be Nice, where we repair furniture. We’re sharing the trade secrets of how we work to help build a community about furniture repairs. This is a disappearing skill and it can help build local businesses that can’t be served any other way than by local experts.
RELATED VIDEOS:
- Bad Furniture Repair #2 - • Bad Furniture Repair and How to Fix I...
- How to Remove Brad Nails - • How to Remove Finishing Nails and Bra...
- Wood Glue Types for Woodworking - • Wood Glue Types for Woodworking | How...
Tool Links (as an Amazon Associate, we earn money from purchases, which help fund our videos work):
- Dremel for cutting brad nails and screws - https://amzn.to/3cNwYxl
- Spreader clamp - https://amzn.to/3bFv0Pz
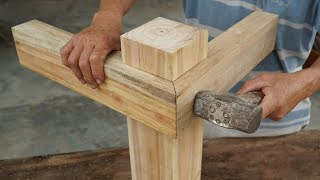
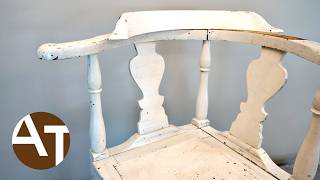
Watch Scott take apart this bad furniture repair - a chair with a broken chair leg that was poorly repaired. The chair leg was held in place with some construction adhesive and brad nails. It might have looked like it was strong enough, but chairs get pushing use, and this didn’t stand up. Because chairs have a lot of shifting wight on them, they’re stressed and can sometimes fail. This bad repair was done by someone who didn’t take the time to learn how to do it the right way (i.e., look it up on YouTube and find someone who can show you how to fix it).
The first step is to gently take apart the furniture parts. This wasn’t easy given how it was put together, but the best tool to help take furniture apart is the spreader clamp. These gently put pressure on the parts to release the joints. Here’s a link if you’re looking to buy some - https://amzn.to/3bFv0Pz
The next step is to clean all the old glue off the parts because we need bare wood for wood glue to work properly. Once the parts are cleaned up, it’s a matter of test fitting the parts to ensure there’s a good fit before applying the glue and clamps. In this repair, there were some wood fibres that needed to be aligned to get the best possible fit. When choosing a glue, you need the right glue for the job. Scott uses 6 different glues (see video link above for more detail) in the workshop and for this project, he chose wood glue and epoxy.
Once the piece is put back together, you may have holes or cracks that need to be filled and stained. Wax sticks and stain markers are easy to use as long as you match them appropriately. See the techniques Scott uses to make all this happen.
Subscribe to Fixing Furniture to get notified when each new video is published. Thanks for watching Fixing Furniture!
Fixing Furniture is not only a YouTube channel but it's also a membership community. Get access to videos before they're published on YouTube, watch all the videos without ads, get downloadable reference sheets, and participate in Fixing Furniture Live every two weeks. Learn more about membership at https://www.fixingfurniture.com
OUR NEWSLETTER - Sign up at https://www.fixingfurniture.com
See the tools we use in our workshop and the tools we recommend: https://www.amazon.com/shop/homeimpro...
🇨🇦 Canadian link - https://www.amazon.ca/shop/homeimprov...
This video is hosted by Scott Bennett, Owner of Wooden It Be Nice - Furniture Repair in Brooklin, Ontario, Canada. https://WoodenItBeNice.ca
#repair #restoration #bad