Published On May 19, 2024
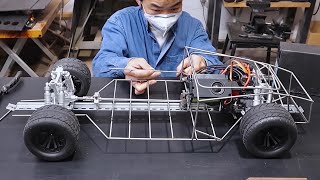
In this video I show you a restomod of a 1/18 Bburago Ferrari 250GTO. I also installed a Tremonia Photoetch metal transkit to build the model more detailed. LED's were also installed in the headlights and taillights. The rims are also unique and also photoetch brake discs have been added.
Used Materials:
Revell Aqua Aluminum, Black matt and glossy, Steel metallic
SMD LED 0603 cold white and red
Revell Contact glue and Uhu 2K Epoxy glue
Evergreen Polystrol sheet 0,35
SD Modelcar wheels VOLK TE37
Custom made rims and tyres
Tremonia Photoetch transkit
Photoetch brake disc set
Molotov Liqiud Chrome marker
00:00 Intro
01:03 Disassemble
02:00 Clean parts
02:21 Engine conversion
03:47 Interior Base Plate
04:30 Ferrari F40 Seat
04:53 Photoetch Seat Belt
05:45 Seat installation
06:30 Photoetch Pedals
06:44 LED Gauges
07:59 Photoetch Interior parts
08:57 Wooden steering wheel
09:35 Interior and engine assembly
09:58 Interior comparison
10:49 Bodywork
11:29 Fender Flares
14:02 Frontspoiler
16:40 Paint Filler
17:23 Glossy Black paintwork
18:12 LED Headlights
18:58 LED Taillights
19:41 Photoetch Grid
20:00 Clear Parts
20:15 Body Assembly
20:41 Soldering
21:01 Final Assembly
21:56 Wheel conversion
24:45 Photoetch window frame
25:32 Hood leather straps
26:12 Detailing
28:27 Finished Car
#bburago #restauration #custom #ferrari #118 #restomod #diecast #customwheels #photoetch #hotwheels #comparison #250gto #ledlights #modelcars