Published On Jun 19, 2024
Getting the Raspberry Pi 5 up and running for non-techies is not as easy as the internet makes it seem. To get started with the Rasberry Pi 5, there are must-needed accessories that you have to buy, like a 27-watt USB-C power adapter that can deliver 5 amps.
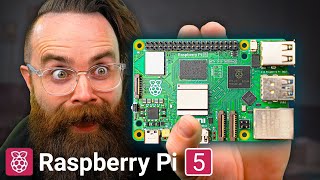
I'm going to show a complete beginner the recommended accessories and how to install them correctly to get started using the Raspberry Pi 5. I know there are many newbies out there who are just getting into programming and just heard of Raspberry Pi 5's, so in today's video, I'll break down how to install everything properly.
The first must-have Raspberry Pi Accessory you'll need is a Raspberry Pi Active Cooler
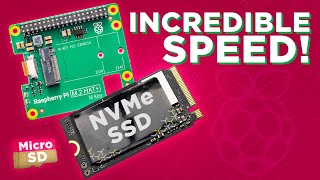
Next, you will need a Micro SD card, preferably 32 GB or higher.
You'll also need a Raspberry Pi Case for Raspberry Pi 5.
Even though the Raspberry Pi 5 has USB-C port for power, your typical phone charger won't work because you'll need 5 amps of power, and 27 watts.
The official Raspberry Pi 27W USB-C Power Supply is made specifically for the Raspberry Pi 5 so this is also a must have.
Additionally, you'll need a micro HDMI to HDMI cable because most monitors use HDMI inputs.
You'll also need a keyboard and mouse. While the Raspberry Pi has an official keyboard and mouse, you can use any USB keyboard and mouse you have lying around, or you can buy any USB keyboard and mouse to plug into the black USB 2.0 slots.
To install the Raspberry Pi Active Cooler properly, take the little cap off the fan input on the Raspberry Pi 5 motherboard first even though connecting the Raspberry Pi Active Cooler fan power cable to the motherboard, is the last thing you need to do
Next, remove the paper covering the blue thermal pads on the Raspberry Pi Active Cooler. All the thermal pads should be in the correct place.
One of the thermal pads will connect directly to the processor, another Raspberry Pi 5 thermal pad will cover the Power Management IC, and the third Raspberry Pi 5 thermal pad will cover the dual-band 802.11ac wireless and Bluetooth 5 chip.
Stick the Raspberry Pi 5 Active Cooler directly on the Raspberry Pi 5 motherboard aligning the holes properly.
Once the thermal pads are in place, connect the power to the fan by attaching it to the fan input on the Raspberry Pi 5 motherboard.
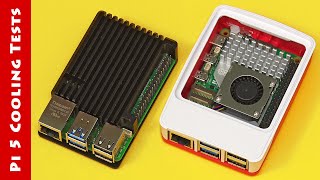
To attach the Raspberry Pi 5 to the case, we need to remove the fan that comes with the case because we can't use both.
Carefully remove it by pulling down the 2 little tabs to avoid breaking anything. It will slide out.
To attach the Raspberry Pi 5 with the Raspberry Pi 5 Active Cooler installed properly to the case, we need to angle the Raspberry Pi 5 with the Raspberry Pi 5 Active Cooler with the power side down so that it can fit correctly and snugly.
Now, attach the top piece with the fan removed and snap everything in place.
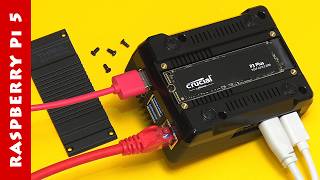
You'll see the USB 3.0 ports (in blue), the USB 2.0 ports (for the keyboard and mouse), the ethernet port, and the power button.
Next, attach the rubber feet to the case.
The last step is to flash the operating system onto the micro SD card and insert it into the Micro SD card port.
Use the middle slot for the micro HDMI to HDMI cable to connect to the monitor. Connect the keyboard and mouse to the black USB ports. Finally, connect the power. A green light should appear, and the Raspberry Pi 5 will power on automatically.
I hope this video helps any newbies out there, as there's often a big disconnect between those unfamiliar with programming and those who want to use the Raspberry Pi 5 for its amazing capabilities.
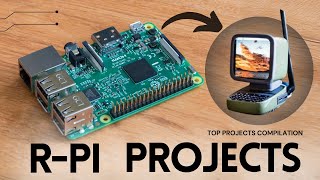
Whether you're using it for home assist with smart home automations, or similar to a VPN (zero trust), or other projects, I'll have more videos and links here in the future.
If you found this helpful, please like, share, and subscribe to the channel.
Leave a comment and let me know where you were stuck or where you are in your buying process with the Raspberry Pi 5 with the Raspberry Pi 5 Active Cooler.
00:00 Raspberry Pi 5 Accessories You Need To Buy
01:48 Install Raspberry Pi Active Cooler Correctly
03:12 Install Raspberry Pi 5 into Raspberry Pi Case Properly
05:00 Where To Plug Cables To Raspberry Pi 5 with the Raspberry Pi 5 Active Cooler