Published On Feb 12, 2019
NOTE: view our latest video, Knotweed Control for Homeowners: 4 Tips for Success!
• Knotweed Control for Homeowners: 4 Ti... . This new video describes a more effective technique that can be used by the non-professional.
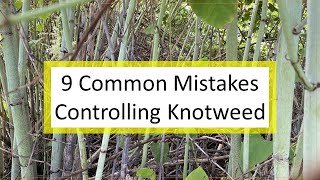
This video describes the cut stem method on knotweed which works reasonably well for the non-professional, the homeowner. (See our companion video: • Control a Large Stand of Japanese Kno... entitled "Control a Large Stand of Japanese Knotweed in 4 Phases.") Japanese knotweed is one of the most invasive and harmful non-native plants in North America.
Here are some of the highlights of the video:
3:11 So, what are the three steps for killing Japanese knotweed? The first step is preparation. This is essential to success.
3:23 Before you start, make sure the targeted plant is indeed Japanese knotweed or is one of the four species of invasive knotweed commonly found in North America….
3:44 In terms of timing, fall is the best time to do your treatment. This is the time of year when knotweed plants are transferring sugars down to their underground rhizomes. Just make sure you treat before a killing frost….
4:08 The tools you need are straightforward. Use a pair of loppers if you have big, tough stems. For small stems, you can use hand pruners.
4:20 For most people the biggest obstacle is figuring out what weed-killer to use and how to apply it. The Green Shoots Small Foam Herbicide Dispenser Package greatly simplifies this task.
4:37 The package contains a concentrated glyphosate herbicide…. The package also contains blue foaming agent that will mark every stem that you treat. Finally, the dispenser dispenses foam herbicide. Foam herbicide is highly effective because it keeps the herbicide in a liquid state for a longer period of time….
5:17 With our method you are going to be cutting the knotweed stems near the ground. Before you start cutting, brush off any dirt that you see on the stems at the bottom of the stems near ground level. The reason for doing this is that dirt can deactivate glyphosate herbicide.
5:37 The second step is to cut the stem about one to ten inches above the ground.
5:45 The third step is to apply the herbicide to cut stump immediately, i.e., within about 5 minutes of making the cut.
5:54 You do this because the stem will seal off the wound caused by the cut fairly quickly. You want to apply the herbicide before this happens.
6:05 Here’s a photo of what the foam herbicide looks like on a cut knotweed stem. Notice how thick the foam is. This thick foam is absorbed into the vascular system of the plant over a long period….
The Green Shoots foam herbicide system has several advantages over conventional spray systems. First, it is highly precise and selective. The foam weed killer can be discharged very slowly and placed on the target location. Second, once placed on the target, the foam herbicide sticks to the foliage or plant tissue of the plant. It doesn’t drip like liquids from a conventional spray system. Third, the foam herbicide dries slowly. This increases translocation of the herbicide so that the roots can be killed. Fourth, the foam herbicide is highly concentrated. This ensures that the mixture is sufficiently powerful to do the job. As explained in the video, using the foam herbicide system is easy. The herbicide can be placed directly on foliage of the knotweed – either the green leaves or green stems. Alternatively, if you want to remove the knotweed immediately, you can cut them and apply the foam herbicide to the remaining stump. If you do a stump application, be sure to apply the foam herbicide immediately after cutting. Knotweeds have extremely extensive underground rhizomes, so be sure to apply the foam herbicide to each stem that you can find.