Published On Apr 12, 2020
See the short follow-up video at: • Addition to my "9 Tips To Install Che...
CHECK OUT MY COMMENTS BELOW FOR CORRECTIONS AND TIPS!
SORRY ABOUT THE DINGING! I HAVE IMPROVED MY YOUTUBE SKILLS WITH PRACTICE!
Here are links to the heat pump, tools, and materials I used:
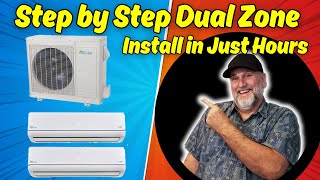
Mr. Cool Advantage 18K BTU 19 SEER Heat Pump Split System: https://amzn.to/2LKQKhD
Spring Bender: https://amzn.to/3eeSTPr
Vacuum Pump: https://amzn.to/2y49DIJ
Manifold Gauge Set: https://amzn.to/39Z27fD
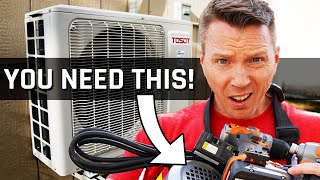
Flaring Tool Set: https://amzn.to/2V3dxe8
Line Set Cover: https://amzn.to/2V3KeI0
Plastic Mounting Pad: https://amzn.to/3edVskU
R410A Adapter: https://amzn.to/2JZTLKc
Deburring Tool: https://amzn.to/2Vluhfy
Nylog: https://amzn.to/2V1uiWK
Non-Fused 30 AMP Electrical Disconnect: https://amzn.to/3pHTKx2
Hole Saw Set: https://amzn.to/3rLfoSS
VIDEO CORRECTION: At 6:44, I meant to say that these caps went on the end of the copper pipe sticking out the back of the inside unit, not on the LINESET! The inside unit is charged with nitrogen for shipping purposes. You can tell if your INSIDE UNIT has leaked when you take the caps off. A good hissing sound means the inside unit has not leaked.
The LINESET in the non-DIY models are not charged with anything. They must be vacuumed out before releasing the R410A in the outside unit. The refrigerant then flows through your vacuumed-out evaporator, and when you open the valves, through the rest of the system.
This is not an installation video; there are lots of those on YouTube. I wanted to give you a little tour around an 18,000 BTU mini-split, and discuss some of the details and techniques involved. I have no professional experience whatever regarding these installations. This was the first one I did, and nothing in this video is to be taken as advice. I'm just showing you the way I did it.
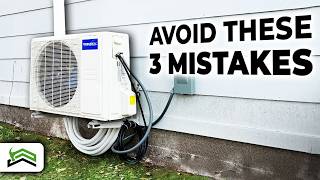
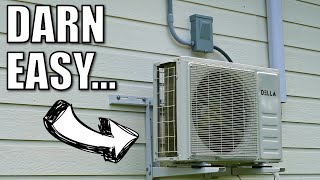
For me, the biggest problem with the DIY models is the 15 feet of line you often see coiled into a loop behind the unit. It's ugly, it looks way too DIY, it is easily damaged, and the loops will (supposedly) allow refrigerant oil to collect in the bottom.
The most common mini-split heat pumps often come in Do-It-Yourself and non-DIY models (the Non-DIY Mr. Cools are labeled "Advantage Series". The Non-DIY models cost about half as much -- though they are virtually the same mechanically. But, you need some extra tools, a little more care, and a little more thought to install these. Also, your warranty MAY be invalid if you self-install a non-DIY model. You are paying a good amount extra for the warranty when you buy the DIY versions of these models. Usually, you can buy another entire non-DIY unit for the cost of that warranty. If something goes wrong, you will have the tools, and hopefully the know-how, to fix it. I like to learn about new tools and techniques, and I love tools, so this is an excuse to get more.
There are dozens of different supposed brands of these little heat pumps. But they are all made by Midea, a huge HVAC manufacturer. They are then re-branded as Pioneer, Senville, Mr. Cool, and many more. They differ in the seller support, and some of the documentation. If you look at enough manuals from different models, you will see that trouble codes (in addition to the looks) are usually identical between brands. That's a pretty good giveaway. You might notice the remotes are a little different. I suspect they all have most of the same functions.
Some manuals are more comprehensive than others. That's because each vendor is able to customize their manuals. If you search the web for the INSTALLATION and MAINTENANCE manuals from the various vendors, you can find out just about everything you need to know, including repair and troubleshooting techniques. One manual or the other might have more information than the manual you got with your unit.
I went with Mr. Cool because it turned out to be the cheapest. Also, Home Depot sells these units, so I figure there must be a lot of them out there, which is always good if you are trying to find out something technical.
Here's a tip I didn't manage to put in the video: When you place your outside unit, place it a little toward the front of the pad and a little off to the side. That way, if you screw up the first flare job, you can slide the unit toward the back or left or right to get some breathing room with the line, cut off the bad end, and try it again. However, you should practice enough in advance with the flaring tool so that you know you can do it right. I used the flares that came on the original lineset as guides, trying to make my flares identical to those. There is also information in the manual about exactly how to position the refrigerant line in the flaring tool to make the flare. Practice, and then practice again.
I do not work for anyone, and I received no compensation to do this video.