Published On Premiered Oct 30, 2023
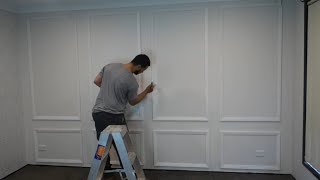
In this video I Ankur Choudhary describe and provide information about how to decor wall with wall moulding
Materials You'll Need:
1)Wall moldings (chair rail, picture frame molding, or other decorative moldings)
2) Miter saw or miter box and saw
3) Measuring tape
4) Pencil
5) Level
6) Construction adhesive
7) Nails and a nail gun (or a hammer and finish nails)
8) Sandpaper
9) Wood putty (optional)
10) Paint and paintbrush
Step 1: Plan the Design
Determine the size and layout of the rectangle you want to create on your wall. Consider the height and width of the rectangle and how it will fit within the overall wall space. Use a pencil and a level to mark the corners and edges of the rectangle.
Step 2: Measure and Cut the Moldings
Measure each side of the rectangle and the desired length of each piece of molding. To create perfect 45-degree angles at the corners, you'll need to make miter cuts. Use a miter saw or a miter box and saw to make these cuts. Remember that the measurements should be taken from the longest points of the molding, accounting for the diagonal cuts.
Step 3: Apply Construction Adhesive
Apply construction adhesive to the back of the molding pieces. This adhesive will help the moldings adhere securely to the wall.
Step 4: Install the Vertical Moldings
Start with one of the vertical moldings. Align it with the pencil marks you made on the wall, ensuring that it's plumb (perfectly vertical). Use a level to check for accuracy. Once it's properly positioned, press it firmly against the wall. You can also use a nail gun or finish nails to secure it in place. Make sure the nails are driven into the wall studs for maximum stability.
Step 5: Install the Horizontal Moldings
Now, attach the horizontal moldings in the same manner, ensuring they meet the vertical moldings at perfect 45-degree angles to create the rectangular shape. Use a level to make sure they are level and plumb.
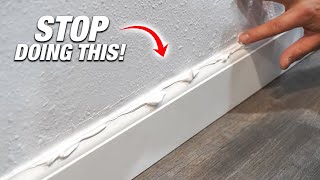
Step 6: Fill Nail Holes and Sand
If you used nails to secure the moldings, fill any nail holes with wood putty. Allow it to dry, and then sand the moldings smooth. This step will prepare the moldings for painting.
Step 7: Paint the Moldings
Paint the moldings with the desired color. You can choose a color that matches or contrasts with the wall's color, depending on your design preferences.
Step 8: Touch Up the Wall
After the paint has dried, you may need to touch up the wall's surface, especially if there are any pencil marks or imperfections. Paint over these areas to create a clean finish.
Creating a rectangle design on your wall with moldings can enhance the room's aesthetics and provide a timeless look. Be patient and take your time with the measurements and installation to ensure a professional and polished appearance.
FIXING TOOLS
https://amzn.to/3Qpfw82
for buying wall moulding contact nearby Interior shop
Thanks for watching perfect floor videos
LIKE ,SHARE AND SUBSCRIBE
@perfectfloor
#perfectfloor #howto #moulding