Published On Jul 31, 2024
1. Create the backing for the rose by taking a small amount of white gumpaste and shaping a disc with your fingers to approximately lin 2.5cm in diameter and 5mm in thickness. Set aside while you prepare your petals for assembly.
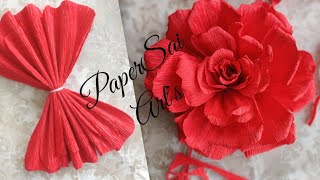
2. Next place the molds or stencils on the wafer paper and trace out five large petals, four medium petals and three small petals. Using scissors, cut out each petal. Then cut a slit into the base of each one to approximately halfway up the petal.
3. First place all five of the largest petals and brush a small amount of wafer paper conditioner over the entirety of each petal.
4. Once all of the petals are covered in WP conditioner, pick them up one by one with the front facing you and roll back the top edges of the petals to shape them. Then cross the right side of the slit over the left, creating an overlap at the base of the petal. That overlap should create a slight cupping effect.
5. After all five of your large petals are curled and cupped, place them on the gumpaste backing, one by one, overlapping them until they are placed around the circumference of the backing disc.
6. Next, repeat steps 4 and 5 for the four medium petals, and again for the three small petals until your flower is complete.
7. When the flower is ready, wrap the artificial stamens with special floral tape and attach them to the wire. Then carefully thread them through the center of the flower.
____________________________________________
My Author's Recipes: https://www.olesiacake.com/
recipes
Subscribe: / @olesia_cake_
My Instagram: / olesia_cake_
Subscribe so you don't miss a new recipe out.
Suggest in the comments what recipe to shoot next.
#waferpaper #waferpaperflowers #paperrose #paperrosetutorial