Published On Dec 18, 2023
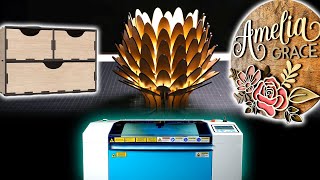
Making a jig for your CO2 or diode laser doesn't have to be complicated. With a few simple steps, and absolute coordinates, you'll be able to make a reusable jig for projects in no time.
~~~~~~~~~~~~~~~~Chapters~~~~~~~~~~~~~~~~
00:00 - Intro
01:01 - Material setup
02:03 - Lightburn jig design
04:45 - Cutting the jig
06:20 - Aligning the jig on the laser bed
09:35 - Locking the jig design in Lightburn and aligning the design
11:42 - Engraving the coasters
14:45 - Outro
~~~~~~~~~~~~~~~~Links~~~~~~~~~~~~~~~~
Use code CREATEDWORKSHOP for 10% off at Monport
Monport 80W CO2 Laser Engraver - https://bit.ly/3N7wLK2
Calipers - https://amzn.to/3NHnsQ2
Exhaust fan kit - https://amzn.to/3GKa8rH
6-inch Duct Hose https://amzn.to/3XSv9Xu
Lightburn - https://lightburnsoftware.com/
Creative Fabrica - https://bit.ly/3WYs2gW
~~~~~~~~~~~~~~~~Camera gear~~~~~~~~~~~~~~~~
Body: Sony a6500 https://amzn.to/3UbILMd
Body 2: Sony a6000 https://amzn.to/3UyW1Kj
Main lens: Sony 18-105mm f/4 https://amzn.to/3fIxjZp
Secondary lens: Tamron 28-75 f/2.8 https://amzn.to/3FOVOi2
~~~~~~~~~~~~~~~~Store~~~~~~~~~~~~~~~~
Check out my store to support Created Workshop! https://createdworkshop.com
~~~~~~~~~~~~~~~~Social links~~~~~~~~~~~~~~~~
Be sure to follow me across social media to stay up-to-date on the latest projects at Created Workshop!
/ createdworkshop
https://tiktok.com/createdworkshop
/ createdworkshop
~~~~~~~~~~~~~~~~Affiliate disclosure~~~~~~~~~~~~~~~~
Some of the links above are affiliate links and Created Workshop could earn a small percentage of revenue from your purchase through them. There is no additional charge for you to use these links, but it does go a long way to support our content.