Published On Nov 18, 2023
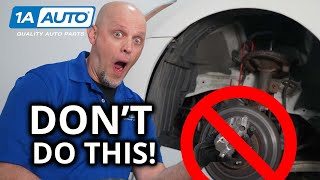
The rear brakes are done differently then the front. On most cars now you no longer can use a compression tool alone. How to Change Kia Soul Rear Brake Pads
00:00 - Show parts and tools
00:48 - Lube used
00:57 - Brake pads used
01:22 - Car Prep
01:35 - Show Brakes
01:55 - Bolts
02:10 - Removal of parts
03:16 - Pad Pull
03:25 - Show piston
03:32 - Condition red
03:45 - Clean piston
06:00 - Lube piston
06:43 - Piston tool
07:15 - Trying needle nose again
08:56 - Using tool to turn piston
09:05 - Turning with tool
10:37 - Replace brake brackets
11:02 - Clean everything
12:45 - Clips installed
12:55 - Back side done
13:15 - Front done
13:30 - Clean and lube slides
15:30 - Adjust piston to be parrallel to pad
16:35 - Tighten bolts and torque
17:15 - Torque 16-23 ft lbs
17:44 - Done reading instructions
18:40 - Fix metal rubbing
19:15 - No scrapping
19:30 - Ending
19:45 - Show special tools
20:25 - Summary
DesignBuildFixReview is a participant in Amazon Services Associates Program. Some of the videos may include a description link to amazon for a product. I earn a small a commission if you click through the link and finalize a purchase.
#CommissionsEarned #ad #Paid Promotion
As an Amazon Associate, I earn from qualifying purchases
Paid link(s)
CRC Heavy Duty Silicon spray
https://amzn.to/3MPppe3
AGS SIL-Glyde 8 oz Tube Silicone Based Brake Assembly Lubricant
https://amzn.to/47Fxr1e Kia Soul Rear Brake Pads
Unpaid links below for other items
Maddox disc brake pad and caliper service tool
https://www.harborfreight.com/disc-br...
Brake cleaner
https://www.walmart.com/ip/Super-Tech...
Akebono rear brake pads
https://amzn.to/3ML8l8P
1. Block front tires with chuck or wood
2. Loosen read lug nuts on the single tire
3 Lift rear car with jack and also support with jack stand
4. Remove cap off brake reservoir
5. Make sure emergency brake is disengaged
3. Loosen lug nuts and remove tire
4. Get bucket or something to support the caliper when you remove it
5. Loosen both bolts that hold the caliper on glide rods with 14mm
6. Take each bolt out and support the caliper
7. Check the new brake pad that it is the same size as the old one
8. Remove pad and its metal plate
9. Replace with new metal plate and new pad clean with brake cleaner as you go
10. Replace pad onto new brackets
10. Twist and remove glide pin clean and regrease replace pins
11. Clean piston with brake cleaner and towel
12. Lube the piston where it touches metal I used silicon lube
13. Take note where the two holes are aligned on the piston itself
14. Compress the piston by turning the piston with the 2 pins using a needle nose plyer or the device I showed clockwise until you think it clears don’t have to do it all the way. I also align the two holes parallel with the caliper the way they were before I moved the piston but lower in.
15. Check and fill brake fluid make sure there is enough and not empty
16. Grease the back side of the brake pads with lube
17. Turn the wheel and see if the metal brackets touch the rotor adjust as needed to reduce noise
18 Make sure no grease on friction portion of the pads clean with cleaner as needed
19. Place the caliper back onto the frame and 17. tighten bolts with 14mm to 16-23 ft lbs
20. I didn’t do this but if you took off the frame that torque is 47-54 ft lbs but you dont need to take off unless you are replacing rotors.
21. Check and fill brake fluid make sure there is enough and not empty
22. Pump brake
Repeat all the process for second wheel
Video made by designbuildfixreview (design build fix review)