Published On Apr 7, 2023
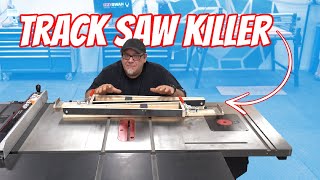
Have you been wanting to add a router table to your woodworking setup but don't have enough space? In this three-part video series, I'll show you how to create a functional router table that can be attached to the side of your cabinet saw!
In this first video, I'll be sharing the step-by-step process of creating a router table that is set into the cabinet saw, the second video will focus on building a fence to attach to the table and the final video will show you how to add a dust collection system. Follow along with me as we explore the necessary tools and techniques required to build this project.
By the end of this series, you'll have a fully functional and space-saving router table that will take your woodworking projects to the next level!
Parts used in this video:
Router - https://amzn.to/39B8vj2
Router plate - https://amzn.to/3MnSgqv
Levelers - https://amzn.to/3MnlYMl
t-track (KM tools) - https://kmtools.com/collections/stop-...
t-track (Amazon) - https://amzn.to/41dsZ6i
Some of my tools:
Router - https://amzn.to/39B8vj2
Trim router - https://amzn.to/3xdowUH
Pocket hole jig - https://amzn.to/3DxARVG
Woodpeckers stainless steel squares - https://www.woodpeck.com/woodpeckers-...
Cabinet Saw (Similar to mine) - https://amzn.to/43rz0P0
Jig Saw - https://amzn.to/3j0Eom8
Circular Saw - https://amzn.to/3v9Nrab
Brad point bits - https://amzn.to/3K6rnmK and https://amzn.to/3x7uAie
Right angle clamps - https://amzn.to/3uP9zX8
Router Template guide bushing: https://amzn.to/3DcHCOE
Round nose router bit: https://amzn.to/3AWTsty
Countersink drill bit - https://amzn.to/3UmxOs8
Flush trim bit (KM tools) - https://kmtools.com/collections/km-to...