Published On Oct 6, 2020
If you were looking for the perfect project to get into Raspberry Pi, it is hard to get better than this! In this video I show you step by step on how to use a Raspberry Pi 3 & LCD screen and stuff them in to the new LEGO NES set!
Thanks to the Sponsor of this video!
JLCPCB!
https://jlcpcb.com/
$2 2Layer 5PCBs,
$5 4 Layer 5PCBs
Thank you for supporting this channel by using the links below. Geeksmithing may earn a commission from these purchases.
For this project you will need the following items:
Raspberry Pi 3 Kit (including SD card and recommended Power Supply):
https://amzn.to/36FzZQG
Pimoroni LCD:
https://www.adafruit.com/product/4338
Wireless Keyboard:
https://amzn.to/34uX7i7
Similar Portable Speaker:
https://amzn.to/30FRrR1
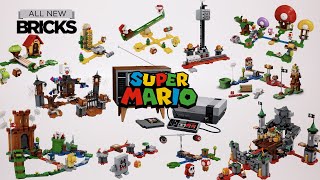
LEGO NES SET:
USA:
https://click.linksynergy.com/deeplin...
CANADA:
https://click.linksynergy.com/deeplin...
UK:
https://click.linksynergy.com/deeplin...
============================================================
LEGO ADVENTURES WITH MARIO SET:
USA:
https://click.linksynergy.com/deeplin...
CANADA:
https://click.linksynergy.com/deeplin...
UK:
https://click.linksynergy.com/deeplin...
===========================================
Software I use:
Adobe Creative Cloud (Includes everything listed below):
https://adobe.prf.hn/click/camref:110...
Adobe Photoshop (Raster Graphics):
https://adobe.prf.hn/click/camref:110...
Adobe Illustrator (Vector Graphics):
https://adobe.prf.hn/click/camref:110...
Adobe Premiere (Video Editing):
https://adobe.prf.hn/click/camref:110...
Adobe After Effects (Video Effects):
https://adobe.prf.hn/click/camref:110...
=============================================
=============================================
Social Links:
Website: http://geeksmithing.com
Twitch http://geeksmithing.com/twitch
Instagram http://geeksmithing.com/instagram
Twitter http://geeksmithing.com/twitter
Facebook http://geeksmithing.com/facebook
Patreon http://geeksmithing.com/patreon
============================================