Published On Sep 17, 2021
#PictureFrameBuild #DIYPictureFrame #FrameJig #TableSawJig #BrattonBuild #woodworking #DIY
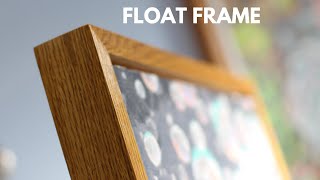
Here’s how to make a jig for the table saw to make perfect miter cuts for your next picture frame. It’s difficult to get frame miters measured correctly since frame pieces have rabbets. This jig makes it easy! See below for tools and supplies used for this build, and step by step directions.
Support Bratton Built Projects by Subscribing to our YouTube Channel
For easy to read direction: https://brattonbuilt.com/?s=miter
PICTURE FRAME JIG DIMENSION:
Base Length: 30 inches (or about 10″ longer than the frames you want to build)
Fence Height: 3 inches
Base Depth: 5 inches
LUMBER USED FOR TABLE SAW JIG:
(1) 30″ x 12″ piece of 3/4″ plywood
(1) 30″ x 1″ piece of 1/4″ wood
(1) 5″ x 4″ scrap of 3/4″ plywood
(1) 5″x3″ scrap of 1/4″ plywood/hardboard
CUT LIST USED FOR MITER JIG:
Base: (1) 30″ x 5″ piece of 3/4″ plywood
Fence: (2) 30″ x 3″ pieces of 3/4″ plywood
Rabbet Runner: 30″ x 1″ x 1/4″ piece of whatever you want to use. (I used a scrap piece of cherry wood)
Stop Block: Base (1) 5″x 4″ piece of 3/4″ plywood, Vertical Piece (1) 5″x3″ piece of 3/4″ plywood, and a 5″x3″ piece of 1/4″ board.
SUPPLIES USED TO MAKE FRAME JIG:
Wood Glue
Super Glue
Sand Paper
Stain (Optional)
Lacquer
Insets with screws and washers
Picture Frame Clips/Fasteners
Picture Frame Brackets and Wire (For larger frames)
(3) 1 1/4″ Pocket Screws
(4) 1 1/4: Wood Screws
TOOLS USED TO BUILD TABLE SAW JIG:
Power Drill
Pocket Hole Jig
Table Saw
(4) 12″ Clamps
Strap Clamp
Electric Stapler (Optional)
Drill Press (Optional)
Orbital Sander (Optional)
STEP BY STEP DIRECTIONS ON HOW TO BUILD THIS PICTURE FRAME JIG FOR YOUR TABLE SAW
STEP 1: CUT AND GLUE FENCE PIECES
Cut two 30″ by 3″ pieces of 3/4″ plywood
Note: 30″ is just what I choose to do. I recommend 10 inches longer than the frame you want to build.
Glue both pieces together and clamp along a straight surface. Then let dry over night.
STEP 2: CUT AND ATTACH BASE
Cut a 30″ by 5″ piece of 3/4″ plywood
Fasten fence to base with (4) 1 1/4″ wood screws after predrilling and countersinking.
STEP 3: ATTACH THE RABBET RUNNER
Glue on a 30″ by 1″ piece of 1/4″ board to the base of the miter jig.
STEP 5: CALIBRATE MITER GAGE
Before attaching miter gage to jig make sure your gage is perfectly dialed in to make perfect 45 degree cuts.
STEP 6: (OPTIONAL) ADD CLAMP TO JIG
See Video: I added this clamp because I thought it would be difficult to support the frame pieces while cutting, however it really wasn’t that difficult.
STEP 7: ATTACH MITER GAGE TO PICTURE FRAME JIG
Optional: Add Inserts to fence to help your jig last longer.
STEP 8: MAKE A STOP BLOCK
This is also an optional step, but I highly recommend it. The stop block really makes it much easier to make perfectly identical cuts.
Cut a 5″ by 4″ piece of 3/4″ plywood and a 5″ by 3″ piece of 1/4″ board. Then glue pieces together. I used wood glue and super glue. The super glue acts as a clamp and it’s ready to used in a few minutes.
Cut a 5″ by 2″ piece of 3/4″ plywood with a 45 degree edge and attach it vertically to the stop block with 1 1/4″ pocket holes.
Clamp block to jig and make 45 degree cut.
Check out more workshop projects:
• Table Saw Outfeed & Downdraft Sanding...