Published On Jul 12, 2021
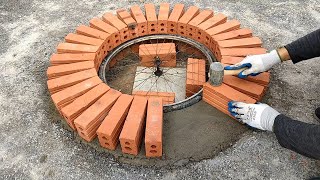
Building your own Fire Table Pit DIY style with a concrete fire table top can be an inexpensive and rewarding project that can greatly improve your outdoor deck/patio experience. This video will show you How to Build an Outdoor Gas Fire Table that uses propane gas.
By following the 6 steps below, you will be able to build you own DIY Fire Table Pit in no-time!
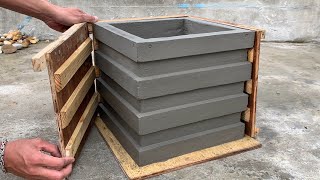
Step 1: Build the Concrete Fire Table Form.
Step 2: Apply Concrete to the Fire Table Form and let it cure.
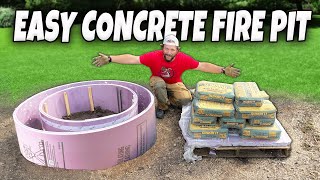
Step 3: Construct a base for your Fire Pit Table Top.
Step 4: Remove the concrete from the Form and seal the concrete fire table top.
Step 5: Install the propane tank, fire pan insert, valve key, etc. and then connect hoses.
Step 6: Place fire glass in the fire pan and the light your DIY Concrete Fire Pit Table!
Each of these 6 DIY Fire Table Pit steps are outlined in detail within this video.
Additionally, check out my Project Blog at ATImprovements.com for more detailed information on this project (e.g. the concrete fire table form dimensions, etc.): https://atimprovements.com/diy-fire-p...
I used the the following Easyfirepits.com products for my build:
- LP-In-Table "ITCK+ Kit" (https://easyfirepits.com/gas-kits)
- PAN28x10 which is 28"x10"
Check out easyfirepits.com for more information. I worked with Rick and he made the whole product selection and ordering process super easy. Check them out!
Product links (some are affiliate) to the tools and products used for this build are below:
Melamine Sheet:
https://www.homedepot.com/p/Veranda-M...
Concrete Dye:
https://amzn.to/3xB4ykT
Concrete:
https://www.homedepot.com/p/SAKRETE-8...
Steel wire reinforcing mesh:
https://www.homedepot.com/p/42-in-x-7...
Drill Mixer:
https://amzn.to/3e36HOL
Glass Cleaner:
https://amzn.to/36vnA0c
Drawer Slides:
https://amzn.to/2T4IdgN
Concrete Sanding Pads:
https://amzn.to/3wzGKNc
Corner Molding:
https://amzn.to/3e3777N
Fire Glass:
https://amzn.to/3yL6tn7
By using the affiliate links above, a small portion of the purchase goes to support Andrew Thron Improvements (and there is NO extra cost to you). Thank you for supporting the channel so I can keep providing free DIY project videos.
This is Episode 8 in my BACKYARD TRANSFORMATION SERIES.
Check out the other episodes below:
Episode 1: DIY Fence on a Budget
• DIY Fence On a Budget!
Episode 2: How to Build a Fence Gate (DIY Fence Gate Ideas) • DIY Fence Gate Ideas (How to Build a ...
Episode 3: How to Extend a Concrete Slab
• How to Extend Concrete Slab (Lessons ...
Episode 4: DIY Concrete Paver Patio
• DIY Concrete Paver Patio (Simple and ...
Episode 5: DIY Trash Can Screen // Horizontal Privacy Screen • DIY Trash Can Screen // Horizontal Pr...
Episode 6: How to Build a DIY Cable / Wire Railing:
• DIY Wire Railing Installation // DIY ...
Episode 7: How to Build a DIY Sectional Sofa
• How to Build a DIY Sectional Sofa (Fr...
Thank you so much for your support and for watching! Please consider dropping a "like" on the video to help my channel grow. Additionally, please subscribe if you like DIY content like this!
Follow me on Instagram at: Atimprovements
#AndrewThronImprovements #DIY #Home Improvement
DISCLAIMER: This is a reference guide only – Build at your own risk. I highly recommend that you have a licensed plumber leak test all connections. Links included in this article might be affiliate links. If you purchase a product or service with the links that I provide I may receive a small commission. There is no additional charge to you! Thank you for supporting ATimprovements so I can continue to provide you with free content each week!