Published On Jul 2, 2023
Step 1:
- HAVE CONFIDENCE (honestly though just believe you’ve been doing this for years, it helps)
Real Step 1: PREP
- Remove all wallpaper/ flaky paint from the wall. (This might include washing the wall over to remove any backing paper)
- Use the tape mentioned on any cracks/ channels for electrics & around any angle beads.
- Mix the PVA with a 70:30 water to PVA ratio & apply two coats. (If the wall is extremely dry from wallpaper stripping, you can PVA the day before also).
- Apply a thicker coat of 50:50.
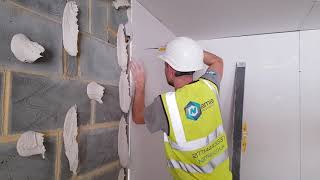
Step 2: 1st Coat
- Use the instructions on the bag to determine how much water to use.
- If using plaster retarder, add to the water first & mix.
- Add the plaster in increments to mix.
- Apply the plaster, Top first (or bottom) to about a 3rd way down. Making sure that it’s thinner at the bottom.
- Then apply from the bottom in one motion, going past the line slightly.
- Once applied & starting to set, go over the wall again with a clean trowel to smooth out.
- Use a brush on the corners & on any imperfections.
Step 3: 2nd Coat
- Mix the plaster so it’s slightly thinner than the 1st coat.
- Apply the plaster but fade at a lower point than the 1st coat. (Instead of a 3rd, go half).
- Take a little extra care as this is the final coat.
- Go over the wall again (once starting to set) & brush the corners & imperfections out.
- Starting from the beginning, smoothen out at wall length if possible, using minimal water.
- When you come across imperfections, either brush them out, or fill with the excess.
- Admire your smooth wall 😁
We have a beginners collection of plastering must haves on our amazon store-front: https://amzn.to/3YJMzGz
Coming up in the next few weeks: building our own media wall; installing an outside tap & more…
Subscribe to our channel for more DIY videos!