Published On Feb 23, 2017
Welcome to our channel! In this video, we'll walk you through the installation process for the Maestro LED+ Dimmer MACL-153M. We will provide detailed, step-by-step walkthrough of the wiring instructions for a 3-way installation.
Sections Covered
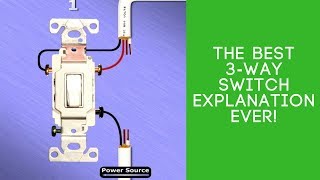
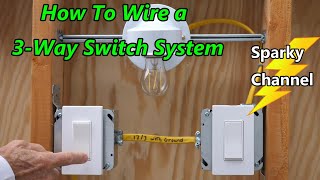
• 3-Way Installation with MACL-153M and Existing Switch: Discover which wires coming from the wall need to be connected to the Maestro LED+ MACL-153M dimmer and how to reconfigure the wires at the existing mechanical switch.
For 3-way installation of the MACL-153M with Companion dimmer, check out this video: • Wiring a 3-Way with Maestro LED+ Dimm...
For single pole installation of the Maestro LED+ MACL-153M dimmer, check out this video: • Wiring a Lutron Maestro LED+ Dimmer (...
• Programming: Learn how to adjust the programming of the Maestro LED+ MACL-153M dimmer to recognize the mechanical switch at the second location. By default, the MACL-153M will be programmed to detect the MA-R Companion dimmer.
We offer a comprehensive knowledge article that addresses installation questions with the Wiring Wizard and FAQs:
https://support.lutron.com/us/en/prod...
Whether you're a homeowner looking to upgrade your lighting control or a professional installer seeking guidance, this video has the information you need to successfully install and program the Maestro LED+ Dimmer MACL-153M.
If you found this video helpful, don't forget to like, share, and subscribe for more tutorials and troubleshooting guides. Thanks for watching!
#Lutron #MaestroLED #SmartLighting #HomeAutomation #SmartHome #LEDLighting #DimmerSwitch #EnergyEfficiency #LightingControl #TechTuesday