Published On Jan 30, 2024
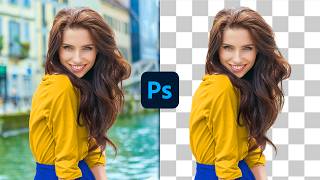
How To Create Path And Make Cutout Photo For Newspaper Page | New Learners | Technical Ayansh | Newspaper Mein Cutout Kaise Lagaye | 2024 Quark Tutorial |
---------------------------------------
Join My WhatsApp Group : https://chat.whatsapp.com/DqUayUbg5i6...
Instagram ID Link : / lo. .
Log on Facebook Page : / technicalaya. .
Twitter : Coming Soon
---------------------------------------
For Business Inquiry Contact Us
E-Mail ID : [email protected]
---------------------------------------
My Playlist : -
QuarkXpress : • How To Set Baseline Shift in QuarkXPr...
Computer Knowledge : • 8 Important Feature in Google Chrome ...
Tech App : • Kinemaster Mein Green Screen Kaise Ha...
Adobe Photoshop : • Adobe Photoshop Tutorial For Beginner...
Youtube Guide : • How To Upload Video Properly in Your ...
Tech Miscellaneous : • SIAM | How To Fill Vehicle Number Pla...
Microsoft Office : • Most Useful Option in Word | Word 20...
Your Queries :
To use the Pen Tool in Photoshop to cut out images, follow these steps:
1. Open Photoshop and open the image you want to work with.
2. Select the Pen Tool from the toolbar. It may be nested under the same tool group as the Freeform Pen Tool or the Curvature Pen Tool. If you don't see it, right-click on the icon and choose the Pen Tool from the dropdown menu.
3. Click on the starting point of the object you want to cut out. This will place the first anchor point.
4. Move your cursor to the next point along the outline of the object and click to place the second anchor point. Continue placing anchor points around the object, following its contours. If you need to create a curved line, click and drag to create handles on the anchor points and adjust them to achieve the desired curve.
5. When you reach the starting point, click on it to close the path. You should see a closed path with anchor points outlining the object.
6. To refine the path, you can adjust the position of the anchor points by clicking and dragging them. You can also adjust the direction of the handles to modify curves. Use the Direct Selection Tool (keyboard shortcut: A) to select and manipulate individual anchor points and handles.
7. Once you are satisfied with the path, right-click on the path and choose "Make Selection" from the context menu. Set the Feather Radius if desired, and click "OK." This will create a selection based on the path.
8. Now you can copy, cut, or delete the selected area. If you want to place the cut-out object onto a different background, create a new layer and paste the cut-out onto the new layer.
9. Use the Layer Mask feature or the Eraser Tool to refine the edges of the cut-out if necessary, blending it seamlessly with the background.
Remember, using the Pen Tool requires practice to achieve precise and accurate selections. Take your time, zoom in if needed, and make adjustments as necessary to achieve the desired result.
Related Tags:
Create Clipping Path,
Paths Tool,
Photo Editing,
How To Use Paths Tool,
Cutout,
Remove Photo Background Photoshop,
Photo Editing Service,
Remove Background From Photo,
#Cutout,
How To Change Photo Background,
Professional Photo Retouching,
Remove Background From Photos,
Photo Background Removal Service,
Image Cutout,
Outsourcing Photo Editing,
Paths Tool Gimp Tutorial,
Car Photo Editor,
Photo Clipping Path Services,
Duplicate Paths
#technical_ayansh
#cutoutphoto
#quarkxpresstutorial
#photoshop