Published On Mar 27, 2021
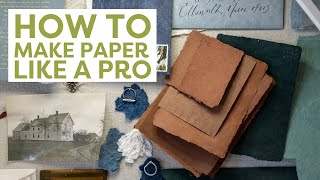
Hi! Today I wanted to share with you my way of doing wedding invitations out of Handmade Paper, because we’ve all seen lots of posts on Pinterest with handmade paper invitations that look so fancy and cool, but they are super expensive.
Tips:
● If you want to try this for your wedding PLEASE start ASAP, because it will take some time to perfect it . After 1 month of making and trying different ways of doing this, I do like 20-30 sheets per day, and for my wedding invitations I need somewhere between 300-400,that’s because I use 2 sheets on one invitation. The issue with this is that not all sheets will came out great, so you will need time to remake them.
● Don’t throw away any bad looking sheet, reuse them, it’s totally fine. You can reuse them even if they are alredy printed.
● For the printing part, I do have my own printer ( Canon Pixma IP2750 ), this printer supports 13x18 ( 5" x 7") paper size. If your printer only allows you to print A4 sheets, you can make the paper A4 size and try to print it. Now if you don’t have a printer, you can try find any printing houses that allow you to bring your own paper. It not that expensive.
● The paper I buy is cheap, as I said in the video, the watercolor one was about 2 dollars, the sketch one the same, and the printer paper was 3 dollars for 500 sheets. So with 5-6 dollars you can make lots of sheets. I use like 1 sheet of watercolor, with one of the sketch paper + 10 of the printer paper,and I make like 10-15 of 5" x 7" paper size, so the ratio will be 1:1:10, BUT my advice is to try and see what works for you.
DISCLAMER
Please note that I am not a professional or an expert in making Handmade Paper or Wedding Invitations, and this is NOT a video about how to recycle paper, you can see that I use new paper, but you can definitely use old paper, but be aware that this will affect the way the printing will look.
English is not my native language so, sorry for any spelling mistakes!
Thanks for being here and I really hope you enjoyed this DIY tutorial!