Published On Feb 25, 2024
1) How to sew a new dress from an old sweater and a piece of fabric in just a couple of hours, even without sewing skills. The style is suitable for any age.
So, for work you need a sweater that is lying idle in the closet and that you don’t mind using as an experiment.
You need to try it on and note at what level the waist line will be. After this, cut off the excess part. If there are stripes, then you need to take this into account so that the seam is even, relative to the stripes.
You will also need any suitable fabric 140–150 cm long, for example, knitwear. My skirt width is 70 cm.
To do this, I folded the fabric along its length and sewed a side seam, and overcast the edges with an overlocker.
I immediately swept over the bottom of the skirt and turned it up 2 cm.
The bottom of the product can be stitched and sewn by hand. I always smooth the adhesive tape over the web, then the edge looks neat.
There are never any problems with it coming off.
I laid a stitch on the other edge and gathered it into gathers. The top of the skirt should be equal to the width of the sweater.
I sewed the skirt to the sweater.
I smoothed and swept the gathers.
When there are such gathers on one side and a flat fabric on the other, the stitching should be done on the flat side, the folds are on the bottom.
I cut out pockets from the cut-off part of the sweater and sewed them to the skirt.
Ready!
The result is a dress in boho style, a style suitable for both girls and older women.
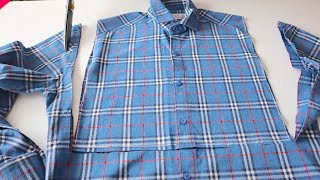
2) I took a practical new sweater and immediately cut it. I’ll show you what an exquisite item in the Chanel style I made (minimal sewing)
First, I shortened the sweater to such a length that it was 5–10 cm below the waist.
I cut off the length of the sleeves, you can make three quarters.
Cut off the neck.
I cut the sweater in the middle. I cut out pockets from the cut pieces.
I rounded all the corners a little.
I laid a line along the neck line so that it would not stretch.
I made a roll for a loop from a strip of fabric. I cut it out on the bias; the peculiarity of the roll is that it turns out as hard as a cord, thanks to its allowances.
You will need bias tape to finish the edges. It can be knitwear, viscose, silk, basically whatever you like.
I basted the binding to the jacket from the wrong side, stitched it and turned it right side out.
I turned it 1 cm and basted it. On rounded corners, I reduced the length of the basting stitches and adjusted the binding itself. After that I stitched.
I finished the bottom of the sleeves with bias tape.
I did the same on the pockets.
I sewed on pockets and a button.
Ready!
A few simple steps - and a completely different thing appeared.
3) Relatives collected old sweaters and blouses and brought them to me for alteration. And I'm just glad. I cut them into squares and make beauty
We select material for work. We cut along the seams, lay them out in piles, the sleeves separate from the shelves, then steam all these pieces with an iron. The thickness of the fabrics is slightly different, some are thicker and some are thinner, but this difference is not noticeable when sewing.
I cut out a 15x15 cm template from cardboard; a blanket will be sewn from these squares.
It’s good to have a special wheel cutter and cutting mat. But, if you try and use scissors, you can cut everything evenly.
I arranged the squares randomly, without any pattern, the main thing is that the same colors should not be next to each other.
I sewed the pieces together using an overlocker. First I sewed strips of 10 squares.
Then I connected them together, and they had to be positioned so that the intersection points coincided.
When I sewed all the pieces together, I ironed the fabric well.
I prepared calico for the wrong side, put the blanket on top, straightened out the folds.
I manually made a basting through two stripes, then lined it and stitched it diagonally. This must be done so that all the squares lie flat and there are no distortions.
Now you can scribble, I decided to do it in diamonds.
To finish the edge I used thick fabric 12 cm wide. The facing will be behind the blanket to increase the size. Finished facing width is 4 cm.
I made special corners for this.
How to make corners:
Without finishing the stitching to the corner, I folded the strip diagonally and marked the point of intersection of the line and that diagonal; here I interrupted the line. I stepped back 8 cm and made a mark.
I attached the 8 cm point to the point where the stitching ended, turned the strip 90 degrees and continued stitching.
I turned the strip over to the front side, smoothed out the corners and stitched.
The blanket is ready.