Published On Oct 25, 2022
This video shows the entire assembly process for the 3D printed Clock.
You can purchase the plans here:
https://jbvcreative.com/products/the-...
Please note that these files are for personal enjoyment only. If you do wish to sell PRINTED versions of this model, you can do so with a JBV Creative Small Business License from / jbvcreative
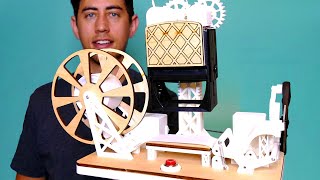
This is a fully functioning 3D printed grandfather clock. Using mainly 3D printed parts, this clock was specifically engineered to be assembled in minutes, and can run for over 6 days on a single winding. With a little bit of tuning, it can accurate keep time with that classic tick-tock sound.
Join the JBV Creative discord server and access the 3D Printed Clock Discord Channel: / discord
Printing Details:
Print Time: ~45 hours of Printing Across 8 Builds
Material: ~650g (Printed in PLA)
Infill: 15-20%
Additional Parts Required:
21 M4x12| 11 M4x20 Screws (https://amzn.to/3zgQb8f)
23 M4 Washers (https://amzn.to/3E1crFU)
17 624Z 13mm OD/4mm ID Bearings (Like these https://amzn.to/3DtUUpH)
1mm Nylon String or Fishing Line (I used string from this set https://amzn.to/3DtUUpH)
5 pounds of weight - could be ball bearings or a dumbbell (I used one from this set https://amzn.to/3zfVKUy)