Published On Jun 17, 2022
Introducing the Freebird 3D Assembly Square
NOW AVAILABLE TO PURCHASE
https://www.etsy.com/uk/listing/12282...
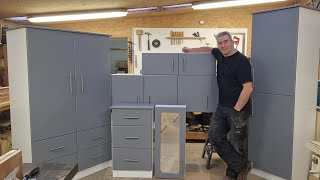
In this tutorial video Brady and I will show you exactly how to build rigid, square and accurately lined up bookcases and other cabinets for built-in furniture projects, using our simple direct-screw assembly method. This method saves time and avoids the need for expensive jointing systems such as the Festool domino, Lamello Zeta P2 or Marvell duo doweller. We at Freebird have all those tools in our workshop in addition to a CNC machine, and we use them all for specific purposes, but we continue to also use the direct-screwing method demonstrated in this video because of its benefits of speed and economy with minimal planning and setup.
You can jump to specific sections in the video using the time-stamped links below.
0:49 - overview of our pre-assembly MDF preparation process
2:42 - Step 1: start by screwing left side of first unit down onto the back panel using pre-drilled kreg screw holes. Using pocket hole joints with an 18mm back panel allows you to do all assembly from above where your can see the front edge line ups, without needing to flip over a heavy unit and risk damaging front edges. This method makes use of the back panel as a squaring reference.
3:23 - Step 2: use the assembled side and back panel as a positioning jig for aligning all other sides ready for marking shelf heights on their front edges
4:00 - plan your drawings to show heights from bottom of unit to top of each shelf
4:30 - after using tape measure to mark heights, use a square to mark across all the front edges
4:47 - set aside the other sides for later, then using the 3D square to position the first shelf.
5:30 - we recommend the screw type clamp over the ratchet clamp if using a lipped shelf
5:51 - Freebird standard method for painted bookcases is to set the shelf 3mm back from the adjoining side
6:07 - using the 9mm referencing edge on the corner of the 3D square for marking the centre of the shelf thickness down the side of your carcase
6:34 - a hole cutout at corner of the square gives your a visual on the line up of the shelf top with your mark on the side
6:45 - using the Spax-M screws for joints in mdf with no splitting
8:04 - positioning the jig for the second shelf (22mm thickness shelf)
9:10 - bookcase internal depth of 250mm is typical for our projects
9:27 - optimum screw positioning from front and back
10:10 - spinning the 3D assembly square round to fix the top shelf
11:00 - outer carcase front edges flush as standard
12:12 - KTX cutter screws as an alternative self cutting option
15:00 - adding screws through back panel to support wide shelves
15:32 - using Confirmation screws for stronger fixings and easier dismantling and reassembly
17:08 - mark tops of shelves for easier re-assembly
17:25 - option to assemble second side with hand pressure and eye to line up with mark (shelf is already squared)
17:34 - recap of the benefits of the Freebird 3D Assembly square system.
18:10 - gallery of some of our fitted furniture projects built using this method.