Published On Mar 6, 2020
Distressed hardwood floors feature the nicks, gouges, and scratches that usually come
with decades of use. Since these imperfections give wood floors their unique, well-worn
character, distressed hardwod floors are much more forgiving when it comes to wear and
tear. They are extremely durable and low maintenance—making them perfect for active
families and people with pets. Richard Daniell, a distressing finisher with Trinity Floors
in Dallas, Texas describes distressed hardwood floors as “bullet proof.” Their rustic
charm complements Southwest, Country, and Old World décor, and can add warmth and
texture to traditional and contemporary interior design schemes. Any type of wood can
be used, but if you are budget conscious, you might want to consider less expensive
woods like Southern Yellow Pine and White Oak, or even factory seconds.
With a simple assortment of inexpensive hand tools, you can distress your new or
existing floor like a pro.
EQUIPMENT & TOOLS YOU’LL NEED:
-Floor sander (rental)
-Floor buffer (rental)
-Paint scraper
You can screw an ordinary paint scraper to an 18-inch length of aluminum or metal
tubing. This will give you better leverage during the scraping step
-Length of metal chain
-Metal file
-Crowbar
-Sponge
-Water bucket
-Broom and dust pan
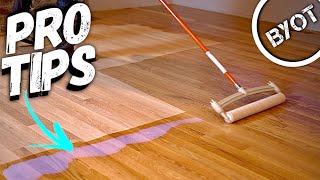
STEPS TO DISTRESSING YOUR HARDWOOD FLOOR
The Double-Scrape Technique
STEP 1-
Begin by sanding the entire area of wood floor that you want to distress.
STEP 2-
Use a sponge to wet a portion of the floor where you will begin scraping. It is best to wet
only a small area—about 2’x2’—at a time. The water lets you see where you are
working.
STEP 3-
Use the paint scraper to scrape against the wood’s grain in the 2’x2’ wet area.
STEP 4-
Wet the same 2’x2’ area again.
STEP 5-
Use the paint scraper to scrape with the wood’s grain in the 2’x2’ wet area.
STEP 6-
Continue the scraping process—first with the wood’s grain, then against the wood’s
grain—until you have scraped the entire area you want to distress.
STEP 7-
Sweep away all the wood shavings.
STEP 8-
On your knees, walk around the entire area, randomly hitting the floor with the length of
metal chain until you have the desired amount of chain marks.
STEP 9-
Use the paint scraper to randomly add long and short scratches to the area until you have
achieved your desired effect.
STEP 10-
Use a crowbar and metal file to randomly add gouges to the area until you achieve the
desired effect.
STEP 11-
After you have finished adding the desired amount of scrapes, nicks and gouges, lightly
buff the floor. Now the floor is ready to be stained and sealed with polyurethane.
MORE FROM YOUR NEW HOUSE
Featured videos:
• YNH Featured Videos
Great DIY Projects from Your New House:
• DIY - Do It Yourself with Your New House
Quick Tips - easy tips to make your projects (and life) better:
• Quick Tips - Great, yet simple ideas ...
Gardening and Landscaping:
• Gardening and Landscaping
Adventures in Homebuilding - Home info with a smile:
• Adventures in Homebuilding
Choosing and Using Tools with Carmen Ciricillo:
• Choosing and Using Tools with Carmen
Factory Tours and Product Testing:
• Did You Know?
Al Carrell - The Super Handyman:
• THE Super Handyman