Published On Sep 19, 2018
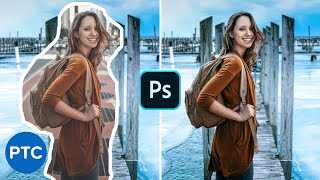
The Complete Easy Step-by-step Process to Create a Composite or Change the Background Using Green Screen in Photoshop! We’ll examine how effective green screens are when it comes to extracting the subject from the background.
In this tutorial, we will learn how to use Advanced Color Range to remove the green background. Then, we’ll continue with some tricks and techniques to develop the perfect mask. In case your image has a green fringe around the edge, we’ll use selective Hue/Saturation to get rid of it easily.
Then, we will go in-depth into techniques that help us match the subject with the background. Learning how to create shadows, we’ll also learn a couple of ways to add special effects at the end to give the image an overall punch and feel.
Hope this video helps. Thank you for watching :)
► RECOMMENDED TUTORIALS:
1. Matching Subject with Background: • How to Match Subject with Background ...
2. Using Check Layers for Composites: • Check & Match Colors Precisely in Pho...
► DOWNLOADS:
1. Sample Images: http://bit.ly/2pk6RYe
2. Finished PSD: http://bit.ly/2plz2Ww (Only for our Patreon Family)
► HELP US CREATE MORE FREE VIDEOS:
Support us at Patreon: / piximperfect
► SHARE: https://goo.gl/IUhnUl
►LET'S CONNECT:
Facebook: / piximperfect
Twitter: / piximperfect
Instagram: / piximperfect
Google+: https://plus.google.com/+UnmeshDinda