Published On Aug 21, 2024
Below are the instructions for the steps we used in this video on - How to Join Wood with Notches to Make Mailbox Post | Easy DIY Woodworking Project .
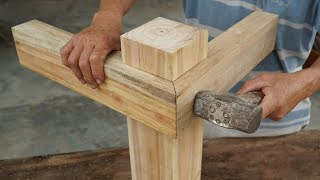
This is a mailbox post with an offset horizontal crossbar:
BTW : If you would rather use wood glue, a common choice is:
Titebond III Wood Glue 4 oz
https://amzn.to/3X9bc19
Its available on Amazon or your big box store.
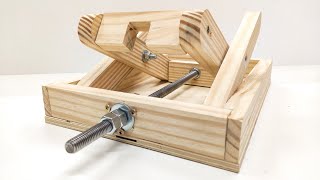
Materials Needed:
- Two 4x4 posts (pressure-treated for outdoor use)
- Measuring tape
- Carpenter's square or straight edge
- Circular saw or handsaw
- Chisel
- Hammer
- Drill with appropriate bits
- Screws (galvanized or stainless steel)
- Wood glue (optional)
Steps:
1.Planning the Notch:
- Vertical Post: - Measure 30-36 inches from the bottom of the post. This will be where the crossbar attaches.
- Crossbar Post: This post will be notched closer to one end to create an offset crossbar that is both functional and aesthetically pleasing..
2. Marking for Cutting:
- Vertical Post: Mark a 3.5-inch square centered at approximately the 30-36 inch mark for the notch.
- Crossbar Post: Mark another 3.5-inch square, closer to one end, leaving about 6 inhes of horizontal post going beyond the vertical post on one end ensuring they're centered so when notched, they will fit over the vertical post's notch.
3. Cutting the Notch:
- Vertical Post:
- Cut along the lines of the square, going about 1/2 of the way through the wood.
- Use a chisel to remove the remaining wood, creating a slot where the crossbar will sit.
- Crossbar Post:
- Cut a notch in the same manner on the crossbar post, ensuring it will fit over the vertical post.
4. Fitting the Notch:
- Test fit the crossbar onto the vertical post. Adjust with the chisel if necessary for a snug fit.
5. Drilling Pilot Holes:
- On the vertical post, drill pilot holes through the sides where the crossbar will sit. Aim for at least two holes on each side of the joint for each end of the crossbar.
6. Assembly:
- Apply wood glue to the notched areas for added strength if desired.
- Fit one end of the crossbar onto the vertical post, creating an offset crossbar.
- Secure with screws through the pilot holes, ensuring they go deep enough into the crossbar for a firm hold.
7. Finishing:
- Ensure the post is level and plumb.
- Secure the vertical post in the ground with concrete or another anchoring method.
- Apply an outdoor sealant or paint to protect the wood.
Tips:
- The offset crossbar design allows for a more unique and functional mailbox setup where the mailbox can be mounted on the crossbar, providing better visibility and access .
- Ensure your cuts are precise for a strong joint.
- Always use safety gear when cutting wood.
This method will give you a sturdy, visually distinctive mailbox post with an offset crossbar, perfect for mounting your mailbox securely and adding a unique touch to your property.
Thanks for watching!
Also, if you are in the market for any tools, check out our Amazon store front.
Visit our amazon store front for our recommendations for tools and supplies for DIY success!
https://www.amazon.com/shop/housebarons
If you click on any of the listed Amazon links there or in this description and buy, you are helping us out as a channel. We are Amazon affiliates and can earn from qualifying purchases and no extra cost for you. Thanks for the help in supporting our channel and enabling us to keep us making videos!
#notchwood #mailboxpost