Published On Oct 13, 2023
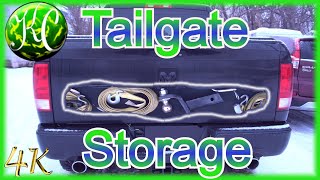
How to install a swing box from Vevor in a truck. For this I’m using my 2006 Dodge Ram. This swing box is a great way to keep any added accessories or tools organized in one spot, dry, and out of the cab. My truck is a regular cab so it doesn’t have loads of room to begin with. #vevor #dodgeram #storagesolutions
5% Discount Code: SAVEMORE5
Get a Vevor Truck Bed Storage Box like mine HERE!
CA: https://s.vevor.com/bfQChx
US: https://s.vevor.com/bfQCgn
UK: https://s.vevor.com/bfQChL
EU: https://s.vevor.com/bfQChA
Website: http://4diyers.com
Patreon: / 4diyers
Facebook: / 4diyers
Twitter: / 4diyers
Instagram: / 4diyers
Tumblr: / 4diyers
Pintrest: / 4diyers
Tools/Supplies Needed:
-10mm wrench
-10mm socket and ratchet
-impact driver
-tape
Procedure:
First is laying out all the parts, you’ll have the box, two brackets that bolt together and fasteners.
Start by putting the main bracket together. It fits over two threaded studs, then using the supplied nuts, tighten it down using a ratchet with a 10mm socket.
For placement of the bracket, first slip it into place on the swing box. Make sure the plastic pivots are in place, then latch the bracket in place towards the front of the box.
I placed a 2x6 under the box to help with some clearance underneath. Considering I have a tonneau cover, the box must be able to clear the hold-down lever. Tape is used to mark out a reference point.
With the bracket removed from the box, use clamps to hold the bracket into place. The latch side of the bracket must also be mounted on the raised portion at the side of the box.
Using an impact driver with a 10mm socket, install a couple of the bolts. These are self-drilling bolts so no drill bits are required. Thread the bolt in like you normally would, it’ll cut the hole and then eventually thread into the steel.
A quick test is done to ensure it’s in the correct position with no interference.
Once satisfied, finish installing the rest of the bolts. There will be 4 by the tailgate and 2 at the latch side.
After that, I used a ratchet and socket to verify the bolts were tight.
A vacuum is used to clean up any shavings.
The latch comes loose from factory and has slotted holes for the alignment. I tightened the nuts so the latch had some movement.
The box is installed and then the latch is adjusted and tightened with a 10mm wrench.
The supplied rubber bumper can be installed, I tried two however I found one was best.
I can finally remove my stuff from the cab and it now has a safe space in the box. There is plenty of storage in this box along with a removable tray.
Here you can see how it fits in my box, this doesn’t affect the main space in the box so I’m still able to put drywall and plywood in the box.
When the box is latched in, simply pull the yellow handle and the box will swing out for easy access.
Even with the tonneau cover on, the box can be easily opened once it’s swung out. The lid can be locked and the box can also be locked in place to prevent theft.
Thank you to all those who watch my videos and support my content. Don't forget to subscribe to my channel for future tutorial videos and like my video if you found it helpful. New videos are always being uploaded every week!
© 4DIYers 2013
All Rights Reserved
No part of this video or any of its contents may be reproduced, copied, modified or adapted, without the prior written consent of the author.