Published On Dec 4, 2021
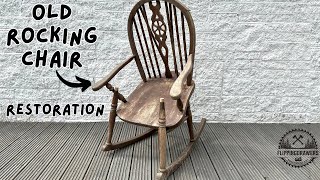
Furniture restoration assembly process. This chair needed new parts after it was damaged by a little puppy. The matching chair is already complete and this video focusses on the techniques to re-glue the chair and assemble all the parts.
The disassembly process is fairly straight forward. The one joint that didn't want to come apart was easily taken care of by applying some white vinegar. I labelled all the parts to make the assembly easier.
The first part to tackle is a split in the arm of the chair. I used a screwdriver to pry open the split and injected glue into the crack with a blunt-tip syringe. Once the split was fully loaded up with glue, I clamp it up and wipe off the squeeze out.
I then move on to gluing up the legs and the stretchers on the chair base. I normally speed up this part of my videos, but this time I explain the detailed steps of what I do and why I'm doing it. It's important to have all your parts oriented in the right spot so the glue-up process will be as quick as possible. The glue will set within about 15 minutes, so you need to be organized. I apply liquid hide glue to the mortises (holes) using the back of an artist's brush to coat the inside edges of the holes. I then use the brush end to coat the tenons before inserting them into the mortises.
I stand up the chair on a perfectly level workbench and put some weight on the seat. This makes sure that when I clamp up the parts, the chair will remain level, which means I won't have to adjust the legs of a wobbly chair after (well... for this chair, you will see later, I had to adjust metal feet on the chair legs after).
Next is the back of the chair. It's held on with wedged tenons. I apply glue to all the parts, line them up, and push them into place. The tenons get hammered in from underneath the chair to secure the back to the seat. I add a few clamps and let the glue dry. After the glue has dried, I attach the chair arms with glue, screws, and reattach the screw caps.
I then stained the new parts and some of the old parts to disguise the repair and some wood damage. I apply a coat of wax to the whole chair and it's now back in working order.
RELATED VIDEOS:
Part 1 - Turning parts for chair restoration • Difficult Restoration of Wooden Chair...
LINKS:
Artist Brushes for Glue - https://amzn.to/3DdcuL6
🇨🇦 Canadian link - https://amzn.to/3G5iJ5C
Syringes for Glue - https://amzn.to/3D64USE
🇨🇦 https://amzn.to/31aN0kY
Titebond Dark Glue - https://amzn.to/3xFQ18F
🇨🇦 UNAVAILABLE
Quick Grip Clamps - https://amzn.to/3G0YYfF
🇨🇦 https://amzn.to/3pbGORw
Note: purchases made with these links help contribute to our video production work
VIDEO TOPICS:
00:00 Chair Restoration After Puppy Damage - Detailed Assembly Process
01:08 Taking the chair apart
01:42 Use vinegar to loosen glue on chair
02:19 Glue split wood with syringe and Titebond Dark glue
05:21 Steps to make new replacement parts
06:11 Glue up the chair legs and stretchers with liquid hide glue
19:43 How a wedged tenon works
20:56 Glue up the chair back with wedged tenons
33:48 Stain new chair parts to match
36:16 How to reinstalling chair arms
39:42 How to install screw caps properly
40:26 Troubleshooting old finish problem
43:02 How to level metal chair feet
45:02 Applying wax to revive wood finish
Fixing Furniture is not only a YouTube channel but it's also a membership community. Get access to videos before they're published on YouTube, watch all the videos without ads, get downloadable reference sheets, and participate in Fixing Furniture Live every two weeks. Learn more about membership at https://www.fixingfurniture.com
OUR NEWSLETTER - Sign up at https://www.fixingfurniture.com
TOOLS - See the tools we use in our workshop and the tools we recommend: https://www.amazon.com/shop/homeimpro...
🇨🇦 Canadian link - https://www.amazon.ca/shop/homeimprov...
This video is hosted by Scott Bennett, Owner of Wooden It Be Nice - Furniture Repair in Brooklin, Ontario, Canada. https://WoodenItBeNice.ca
#Chair #Glue