Published On Jan 31, 2023
Step by step instructions for embroidery herringbone stitch. Left and right handed. Will also be making the pillow with a zipper enclosure.
Link to:
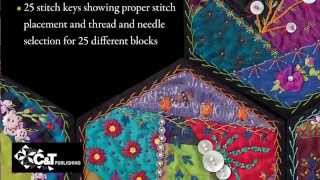
Part 1 - how to sew a crazy quilt square
• HOW TO SEW CRAZY QUILT SQUARE - PART 1
Part 3 - finishing the crazy quilt
• HOW TO FINISH CRAZY QUILT - PART 3 - ...
I am a participant in the Amazon Services LLC Associates Program
As an Amazon Associate I earn from qualifying purchases.”
This video and description contains links, which means that if you click on one of the product links, I’ll receive a small commission. This helps support my channel and allows me to continue to make videos like this. Thank you for the support!
Amazon Paid Links:
Omnigrid 24” long ruler
https://amzn.to/3iofXCk
Large cutting mat
https://amzn.to/3GtInTt
Rotary cutter
https://amzn.to/3XetA5W
Fabric Marking Pen
https://amzn.to/3WPqFQt
Alex Anderson 4 in 1 sewing tool
https://amzn.to/3jiUH1h
Supply List:
-thread to match most fabrics
- long quilting ruler
-rotary cutter
-sewing machine
-sewing needle
-sewing scissors
-sewing pins
-sewing knitting gauge
-marking pencil or fabric marker
-ironing board and iron
-12” zipper
-16x16”(40x40cm) prewashed fabric backing for pillow
-16x16”crazy quilt top
Time stamps:
00:00 Intro
4:15 Herringbone stitch
5:15 Left handed embroidery
7:40 Right handed embroidery
15:50 Making pillow
Donate to my Crafty Patti Channel
If you would like to support me so I can continue to publish more fun videos, then you can make a donation by clicking on the link below. Your kind donation will be sent to my business PayPal account. Thank you so much!
Donate to my channel
https://www.paypal.com/cgi-bin/webscr...
Music: Gold by. Rob Simonsen - IMovie music library
Follow me on:
YouTube: / @craftypattiartscrafts
Facebook: / craftypatti
Pinterest: / pins
Email: [email protected]