Published On Jan 3, 2022
Join us as we build a sliding door on our workshop here at the new farm!
Full video transcript:
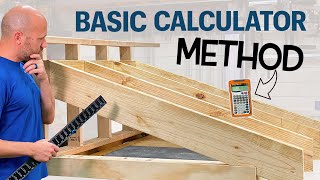
One of the first big projects we tackled was to build a sliding door on the workshop. Although the shop already had an overhead door, it was only eight feet tall, which was not using the full potential headspace that the ten foot trusses would allow.
The first order of business was to clear off the end wall where the door would be. This included removing a short section of the built in shelving. We then drilled two small holes in the metal from the inside of the building so that we could then go on the outside of the building and use them as a reference point to mark where the door opening would eventually be. From there we were able to measure and mark how high the door track needed to be and where the track needed to be centered.
Next we needed to put up the two by four that the door track would actually hang from. Since this needed to be several inches above the bottom of the truss, the only thing we had to fasten to were the angled brace pieces of the truss. Since it had to be on the outside of the metal, we had to cut short pieces of two by four that would fit between the ribs of the metal and act as spacers. We tacked the spacers and the two by four in place with screws, then drilled through all three thicknesses of two by four and fastened them together with six inch carriage bolts.
This style of door track generally comes with right angle brackets similar to these, which fit in the keyholes in the top of the track for hanging it. For some reason, the store where we bought the door track didn’t have any of these brackets the day we were there. Although we almost certainly could have ordered some online, we decided to go a different route and screw the track directly up to the two by four from underneath. I couldn’t find the correct bolts to put the end caps on the track, so to allow us to continue with the project, I used a decking screw and a scrap piece of wood. We can always change this later.
With the track up, it was time to start building the door itself. The first step was to attach the hangers to the top rail of the door. You might assume that a twelve foot wide door would require twenty-four feet of track, but it’s possible to use a shorter track if you place the hangers in a certain distance instead of all the way to the edges of the door. To make sure the door can both open and close completely, the distance between the outside edge of each hanger and the opposite end of the door should be no more than half the length of the usable track. We were using a twenty foot track, and since the end caps kill about an inch on each end, that would make half the usable length nine feet eleven inches. I like to have a little extra wiggle room, so I placed each hanger nine and a half feet from the opposite end of the top rail. Once the hangers were bolted in place, I also added one of these L straps on each end to make it easy to put the first couple screws in the side pieces when it was time to put them up.
Before continuing with the door, we cut and removed the metal from the door opening. We also removed some of the wall framing, but left the upright pieces and the top two two by sixes in place in case we needed something to lean the ladder against before the project was over.
With that done, we kept working on the door. Some people like to build the entire door on the ground and then hang it, but there are a couple advantages to doing it this way. One, the top rail alone is a lot lighter and easier to guide into the door track than the entire door would be. Also, doing it this way, you can check all of your measurements and check for clearance as you go, rather than getting the entire door done only to find that you made a mistake early in the process.
The next day, we put the metal on the door. We were able to reuse three pieces from the wall and we used one new piece. After that, we finally removed the remaining two by sixes and the upright four by fours to open up the doorway completely.
We put an upright two by six on the outside of the metal on each side of the doorway to give something for the door to seal against. We also added one of these latches on each side of the door, which closes it pretty tightly. This gave us a pretty good seal on the sides of the door. There is still an air gap at the top and the bottom, which we’ll probably address at some point in the future, but for now, we’re calling it good.
Aside from a few small details like that, we now have a fully functioning ten by twelve sliding door, that has already allowed us to get projects into the shop that would never have fit through the overhead door.
Thanks for watching!