Published On May 2, 2022
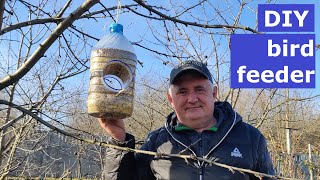
Recycle, repurpose, or reuse a 2-liter plastic bottles to make these one-of-a-kind (and kid friendly) DIY Bird Feeders from a 2-Liter Plastic Bottle.
NOTE: As an Amazon Associate I earn from qualifying purchases. Get all of my favorite crochet, sewing, crafting and cooking supplies here: https://www.amazon.com/shop/birchcott...
Tools Needed:
• scissors - https://amzn.to/3k5ecY0
• permanent marker - https://amzn.to/3K7vZbz
• paint brushes - https://amzn.to/3LeVeKz
• drill & drill bit - https://amzn.to/3vbdHlz
• glue gun - https://amzn.to/3k8XiYA
• funnel - https://amzn.to/3LdsOAB
Supplies Needed:
• dish soap - https://amzn.to/3LstuSV
• outdoor paints - https://amzn.to/3saHxVB
• glue sticks - https://amzn.to/3k8XiYA
• rope or twine - https://amzn.to/3k5XnMr
• bamboo skewer - https://amzn.to/3OyaOTz
• bird seed - https://amzn.to/3LeW2PB
INSTRUCTIONS:
Wash the Plastic Bottle and Remove Label
Before you begin making your bird feeder, be sure to remove the label and wash the 2-liter plastic bottle inside and out. Then you’ll also want to make sure the bottle is completely dry.
Cut the Bottle Down to Size
I used Diet Coke bottles for my bird feeders, but you can use any brand. So, for my bottles I poked a whole in the bottle using the sharp end of my scissors right below the ridge where the top of the label was.
Then you’ll insert the scissors in that hole and cut all the way around the bottle until it is cut into two pieces.
Cut Two Holes
On one side of the bottom piece, place the bottle cap on the side of the bottle where you want the opening. Trace around the cap with a permanent marker. You’ll then cut this opening.
You’ll also puncture a hole centered just below the opening for the perch.
Paint the Bottles
Remove the cap from the bottle. Paint the entire outside of the plastic bottle parts in your favorite colors. Allow to dry between coats. I used at least three coats of paint.
Then you can add decorative elements to the bird feeder using paint and smaller brushes.
Try to avoid getting paint on the threads where the cap screws onto the bottle.
And you will also want to paint the bottle cap. My caps only took 2 coats of paint. You do NOT want to paint inside the cap.
Drill a Hole in the Cap
You will want to drill a hole in the cap that is big enough for your twine to fit through. Then fold your twine in half and insert it from the bottom of the cap. Tie a double knot in the ends of the twine. The knot will keep the twine from pulling through the cap. You can also secure with a dot of hot glue.
Glue the Bottle Together
Before you glue the bottle together, insert the skewer into the hole for the perch and place a dab of hot glue on the inside bottom of the bottle to hold the perch in place.
Then form a bead of hot glue near the top edge of the bottom piece of the bottle and insert the bottom cut edge into the top piece.
Use a Funnel to Fill
To keep from spilling the bird seed, use a funnel to fill the bird feeder from the spout. Screw the lid on and your bird feeder is ready to hang.
When it’s time to refill your bird feeder, simply unscrew the cap and fill.
=========
My video equipment:
Camera: https://amzn.to/38EnXVd
Lens: https://amzn.to/2Gqdilc